

Create your account
To access the assistant, you first need to create a Volubile account.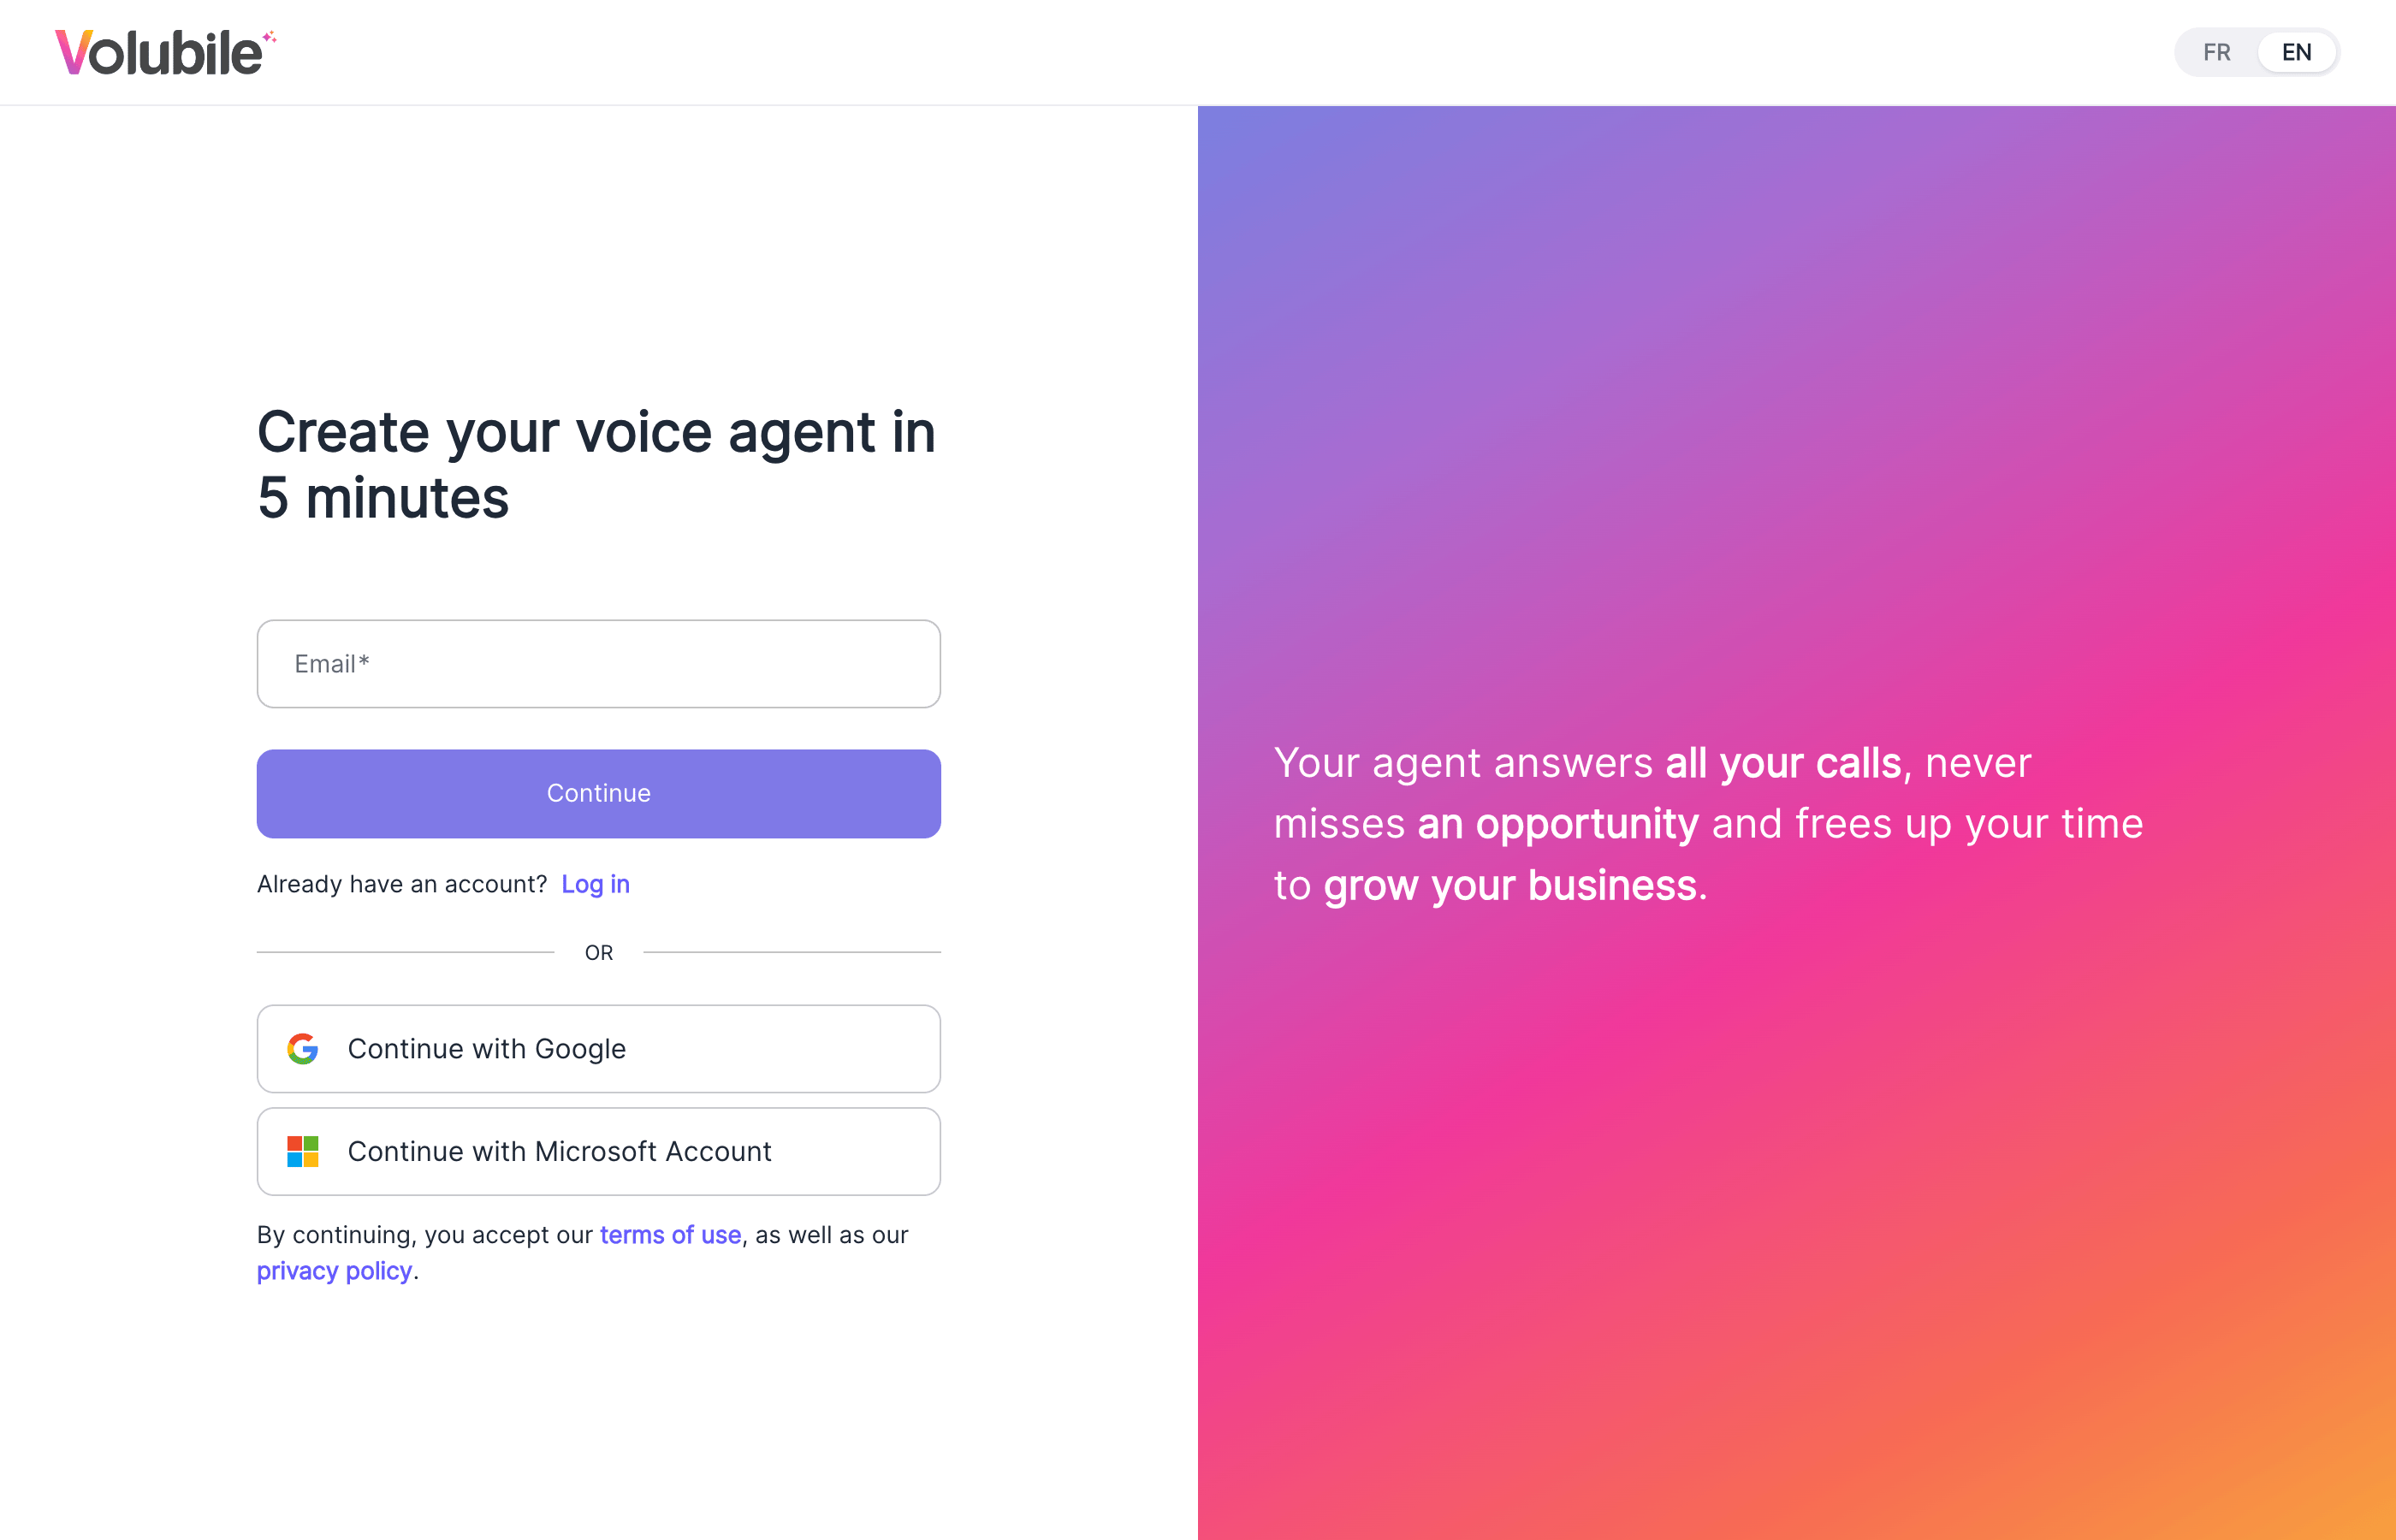
1
Enter your email address
Enter your email address, then click Continue.
2
Choose a password
Set the password for your account.
3
Confirm your email address
Confirm your email address to validate the creation of your account.
You can also continue with Google or a Microsoft account. If you already have an account, click Log in. By continuing, you accept the terms of use and the privacy policy.
Which screens will you see?
1. Your business
Enter your contact details and website
The welcome screen asks for a few details about you, then your website address.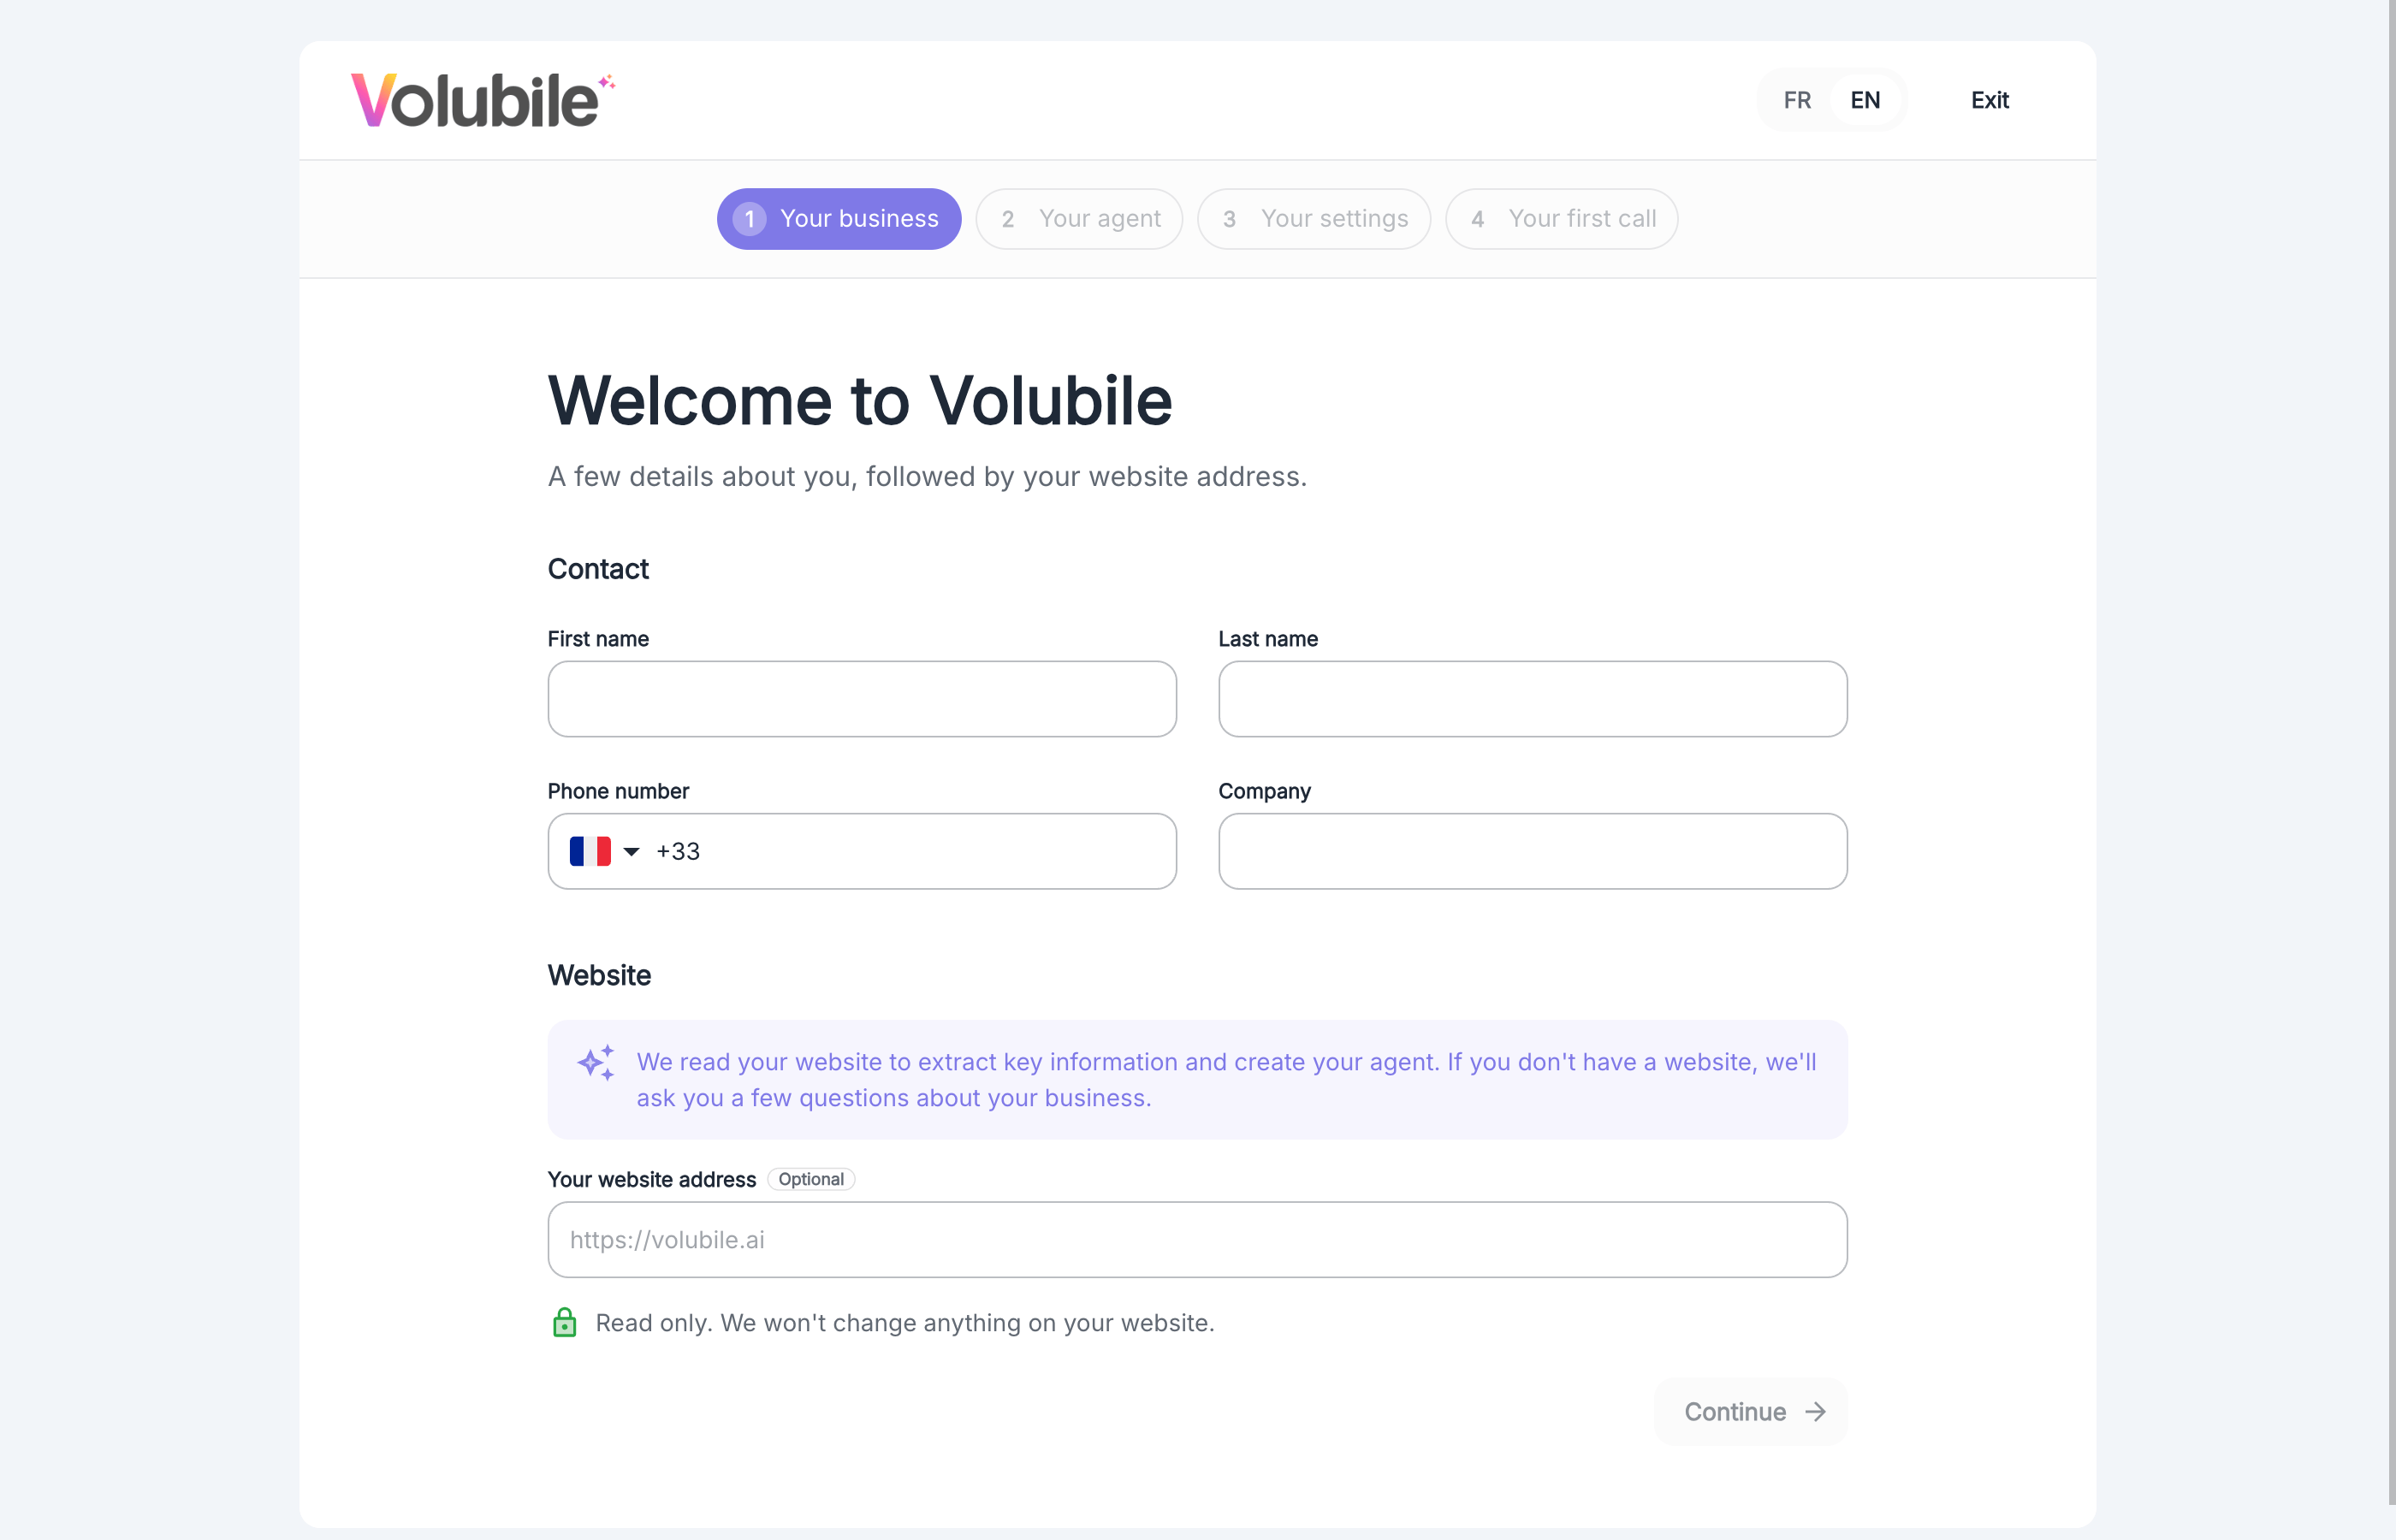
- Contact: first name, last name, phone number and company.
- Website (optional): Volubile reads your website to extract key information and create your agent. Access is read only, nothing is changed on your website.
If you do not enter a website, the assistant asks you a few questions about your business on the next screen.
Describe your business
This screen only appears if you did not enter your website address.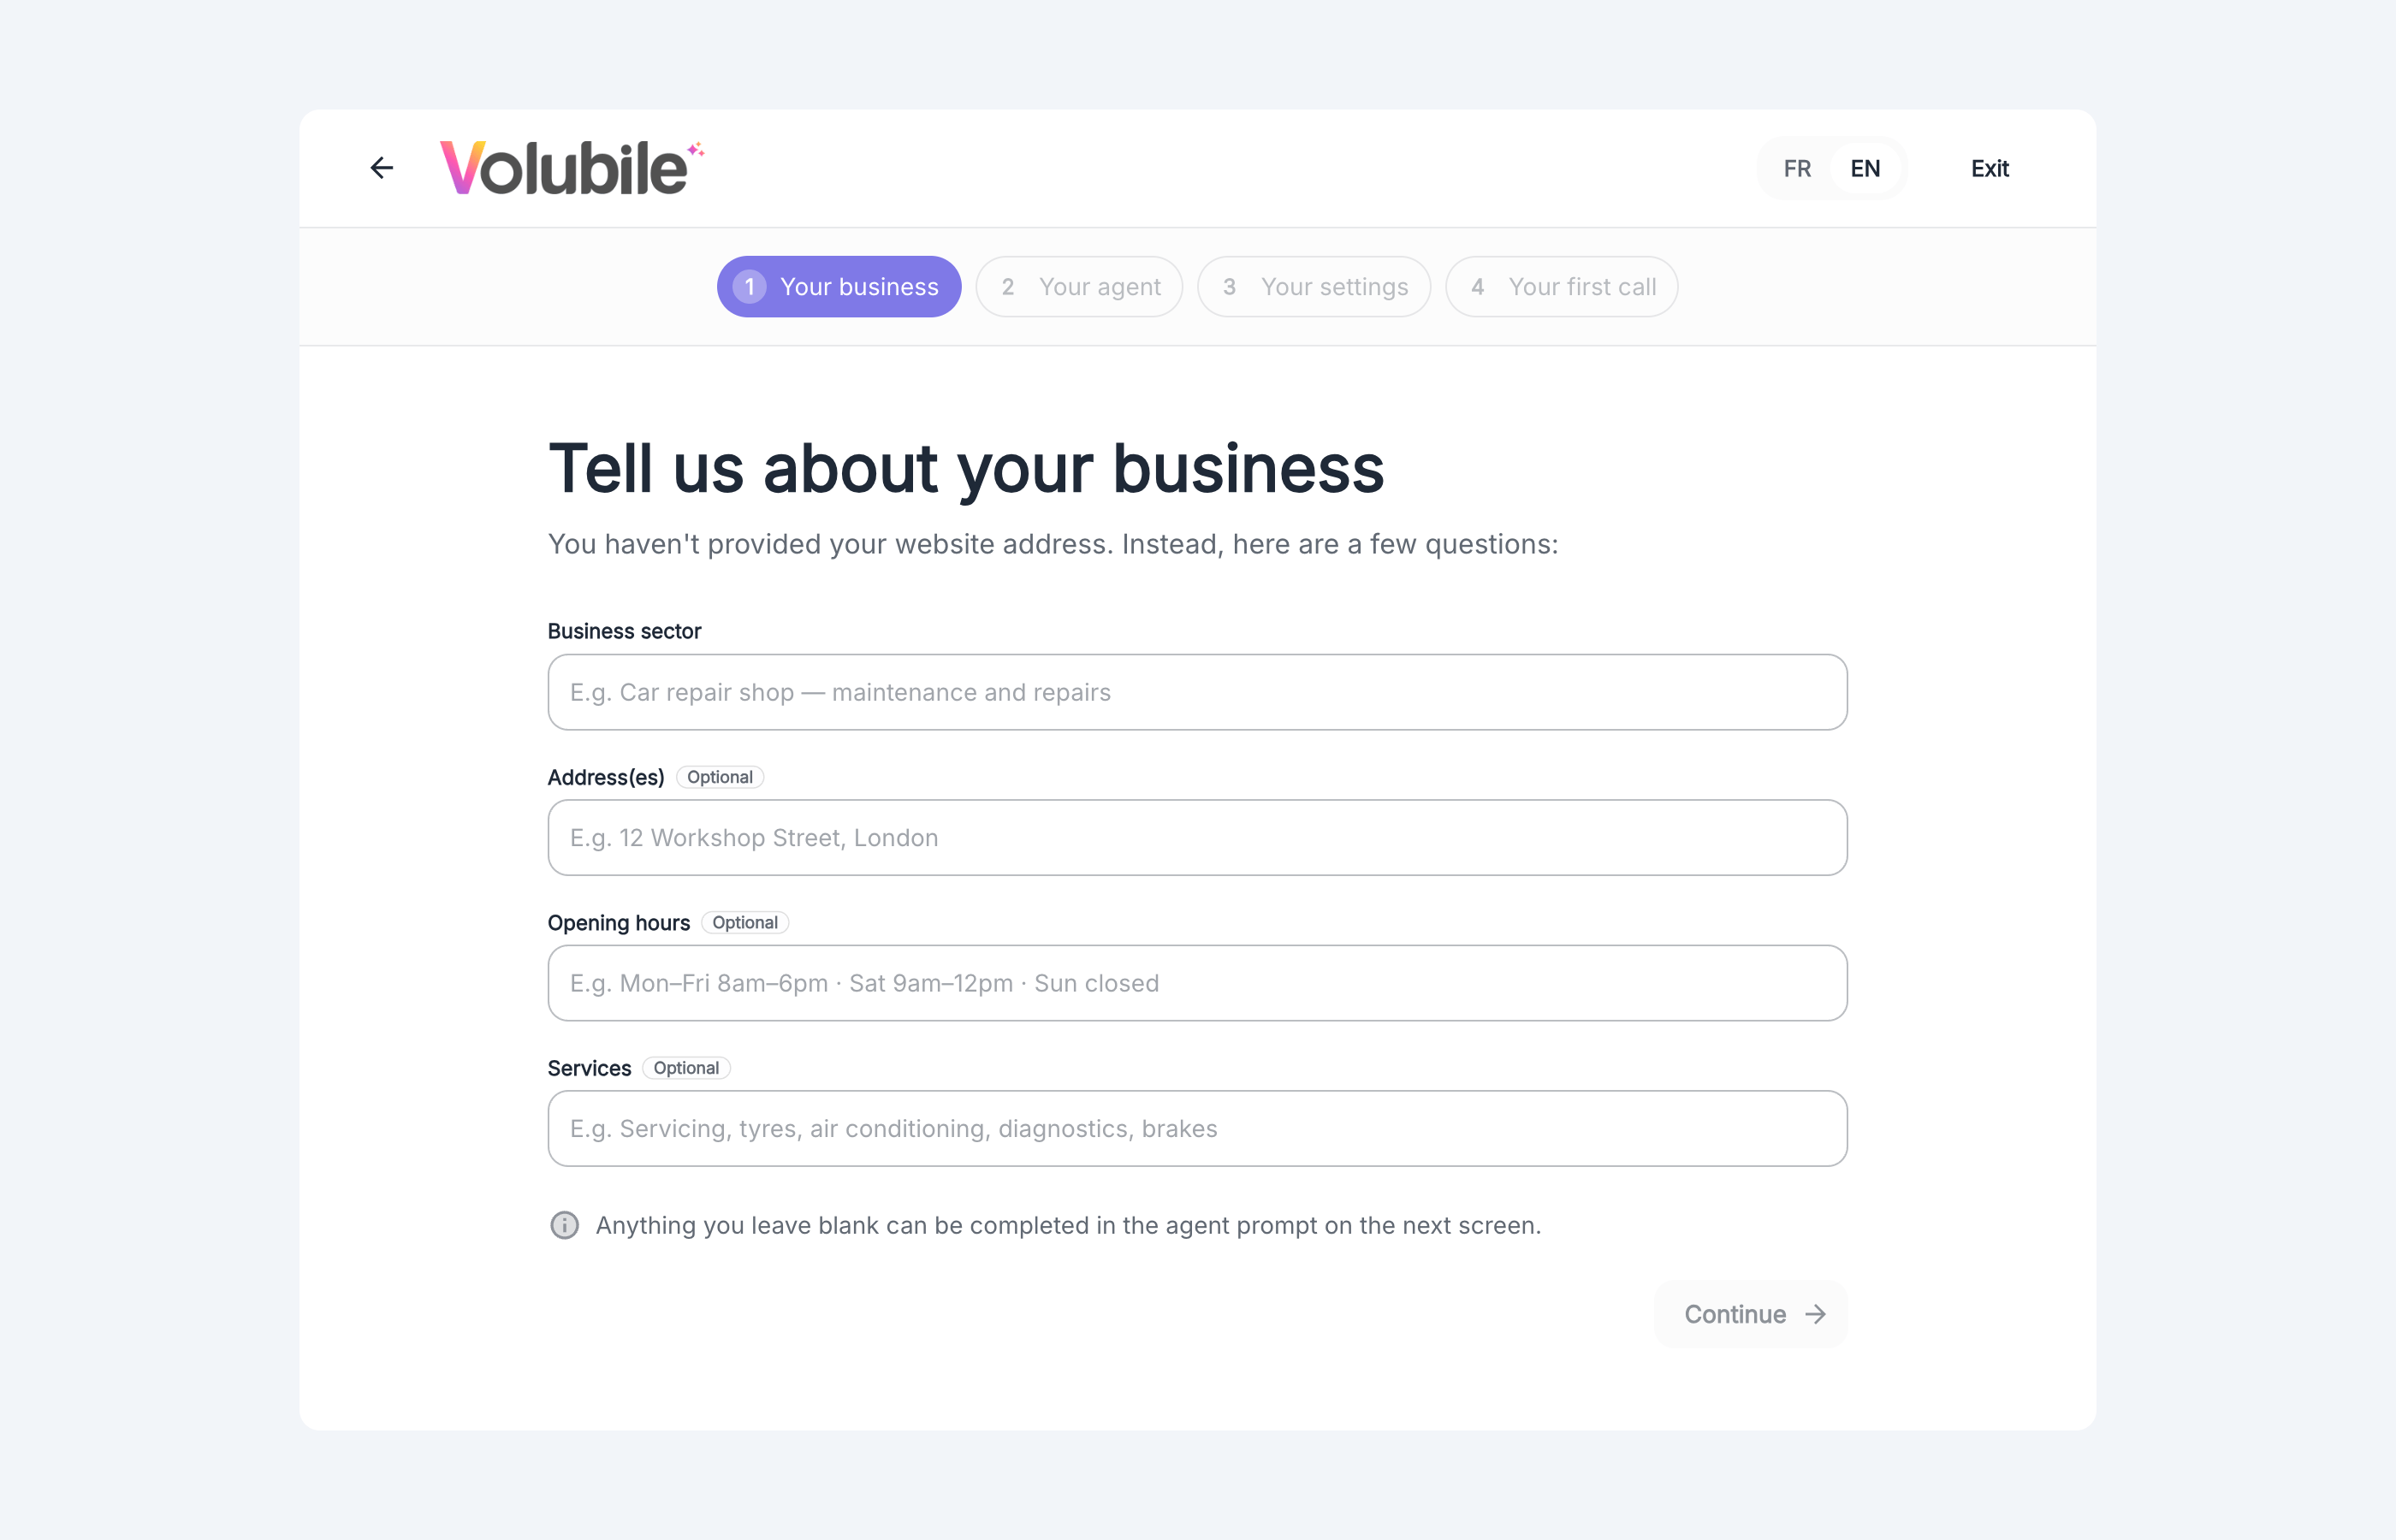
- Business sector: describe your business in one line, for example a car repair shop for maintenance and repairs.
- Address(es) (optional)
- Opening hours (optional)
- Services (optional)
2. Your agent
Configure your agent
Name your agent, choose its tasks and add your documents.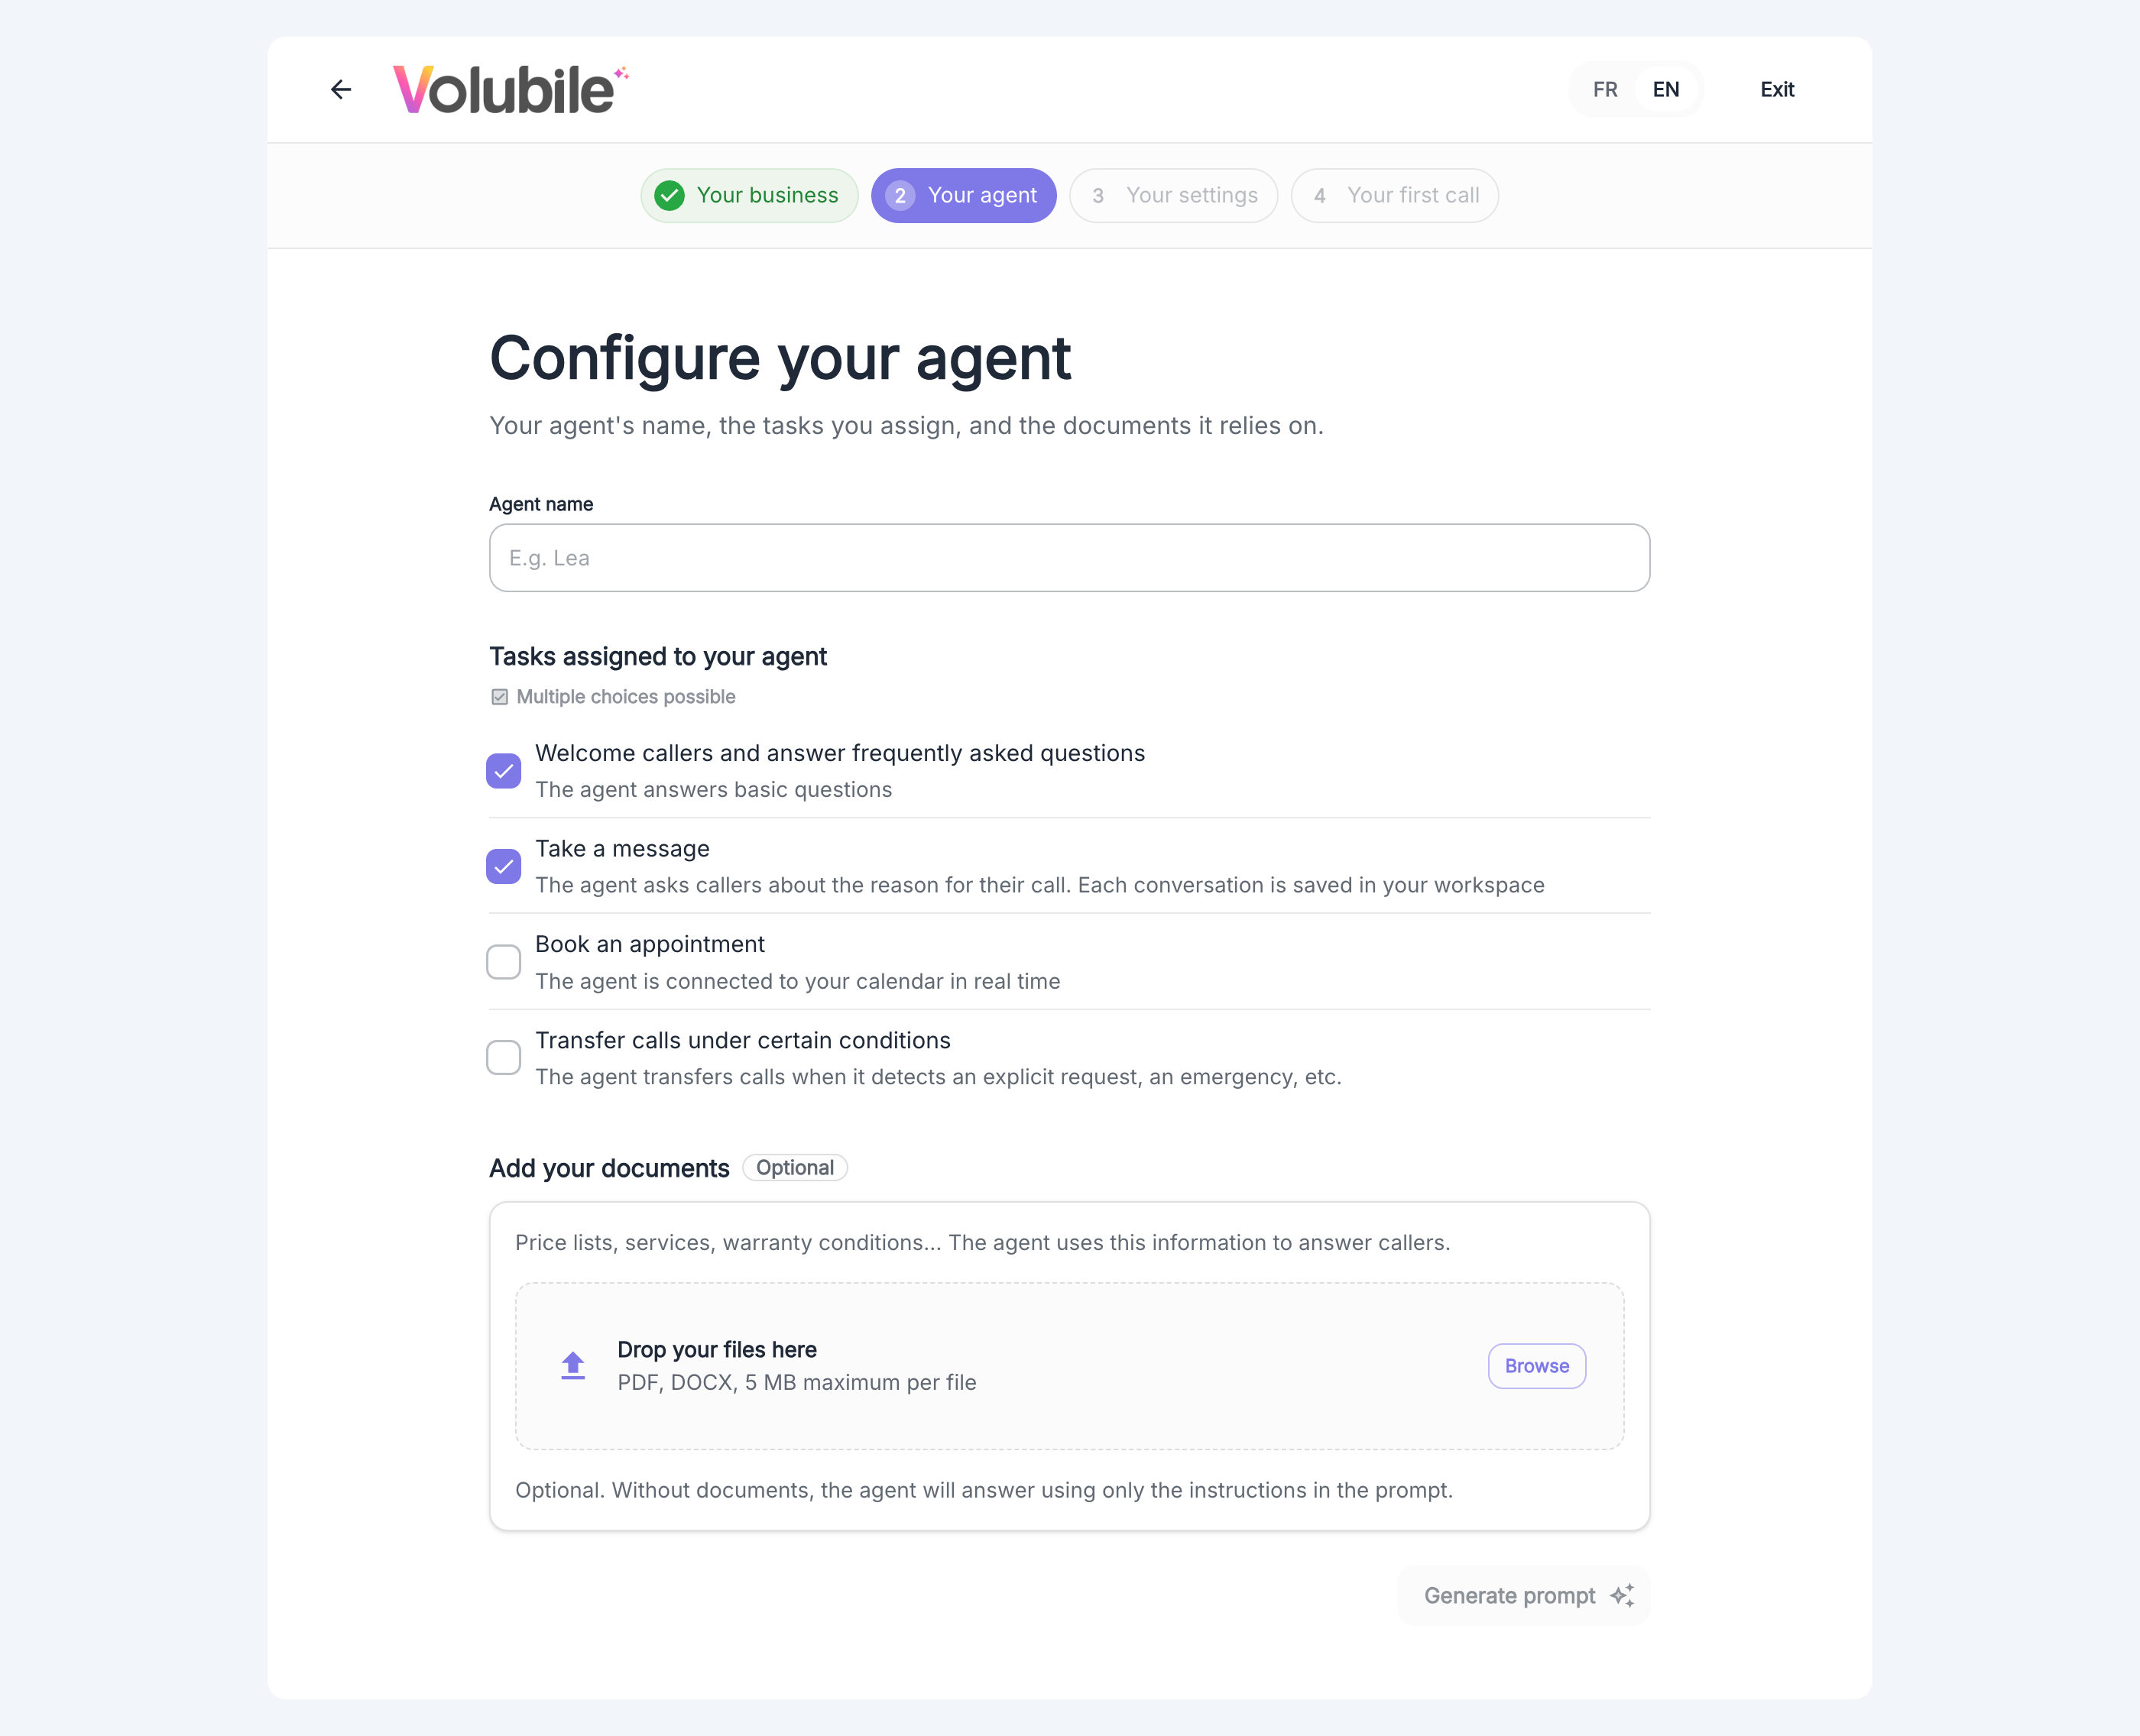
1
Name your agent
Enter the first name the agent will use, for example “Lea”.
2
Choose its tasks
Multiple choices are possible:
- Welcome callers and answer frequently asked questions: the agent answers basic questions.
- Take a message: the agent asks callers about the reason for their call. Each conversation is saved in your workspace.
- Book an appointment: the agent is connected to your calendar in real time.
- Transfer calls under certain conditions: the agent transfers calls when it detects an explicit request, an emergency, and so on.
3
Add your documents (optional)
Drop your price lists, service descriptions or warranty conditions. The agent uses this information to answer callers. Accepted formats are PDF and DOCX, with a 5 MB maximum per file. Without documents, the agent answers using only the instructions in the prompt.
4
Generate the prompt
Click Generate prompt.
Review the prompt
Volubile generates the welcome phrase and the agent instructions from your answers.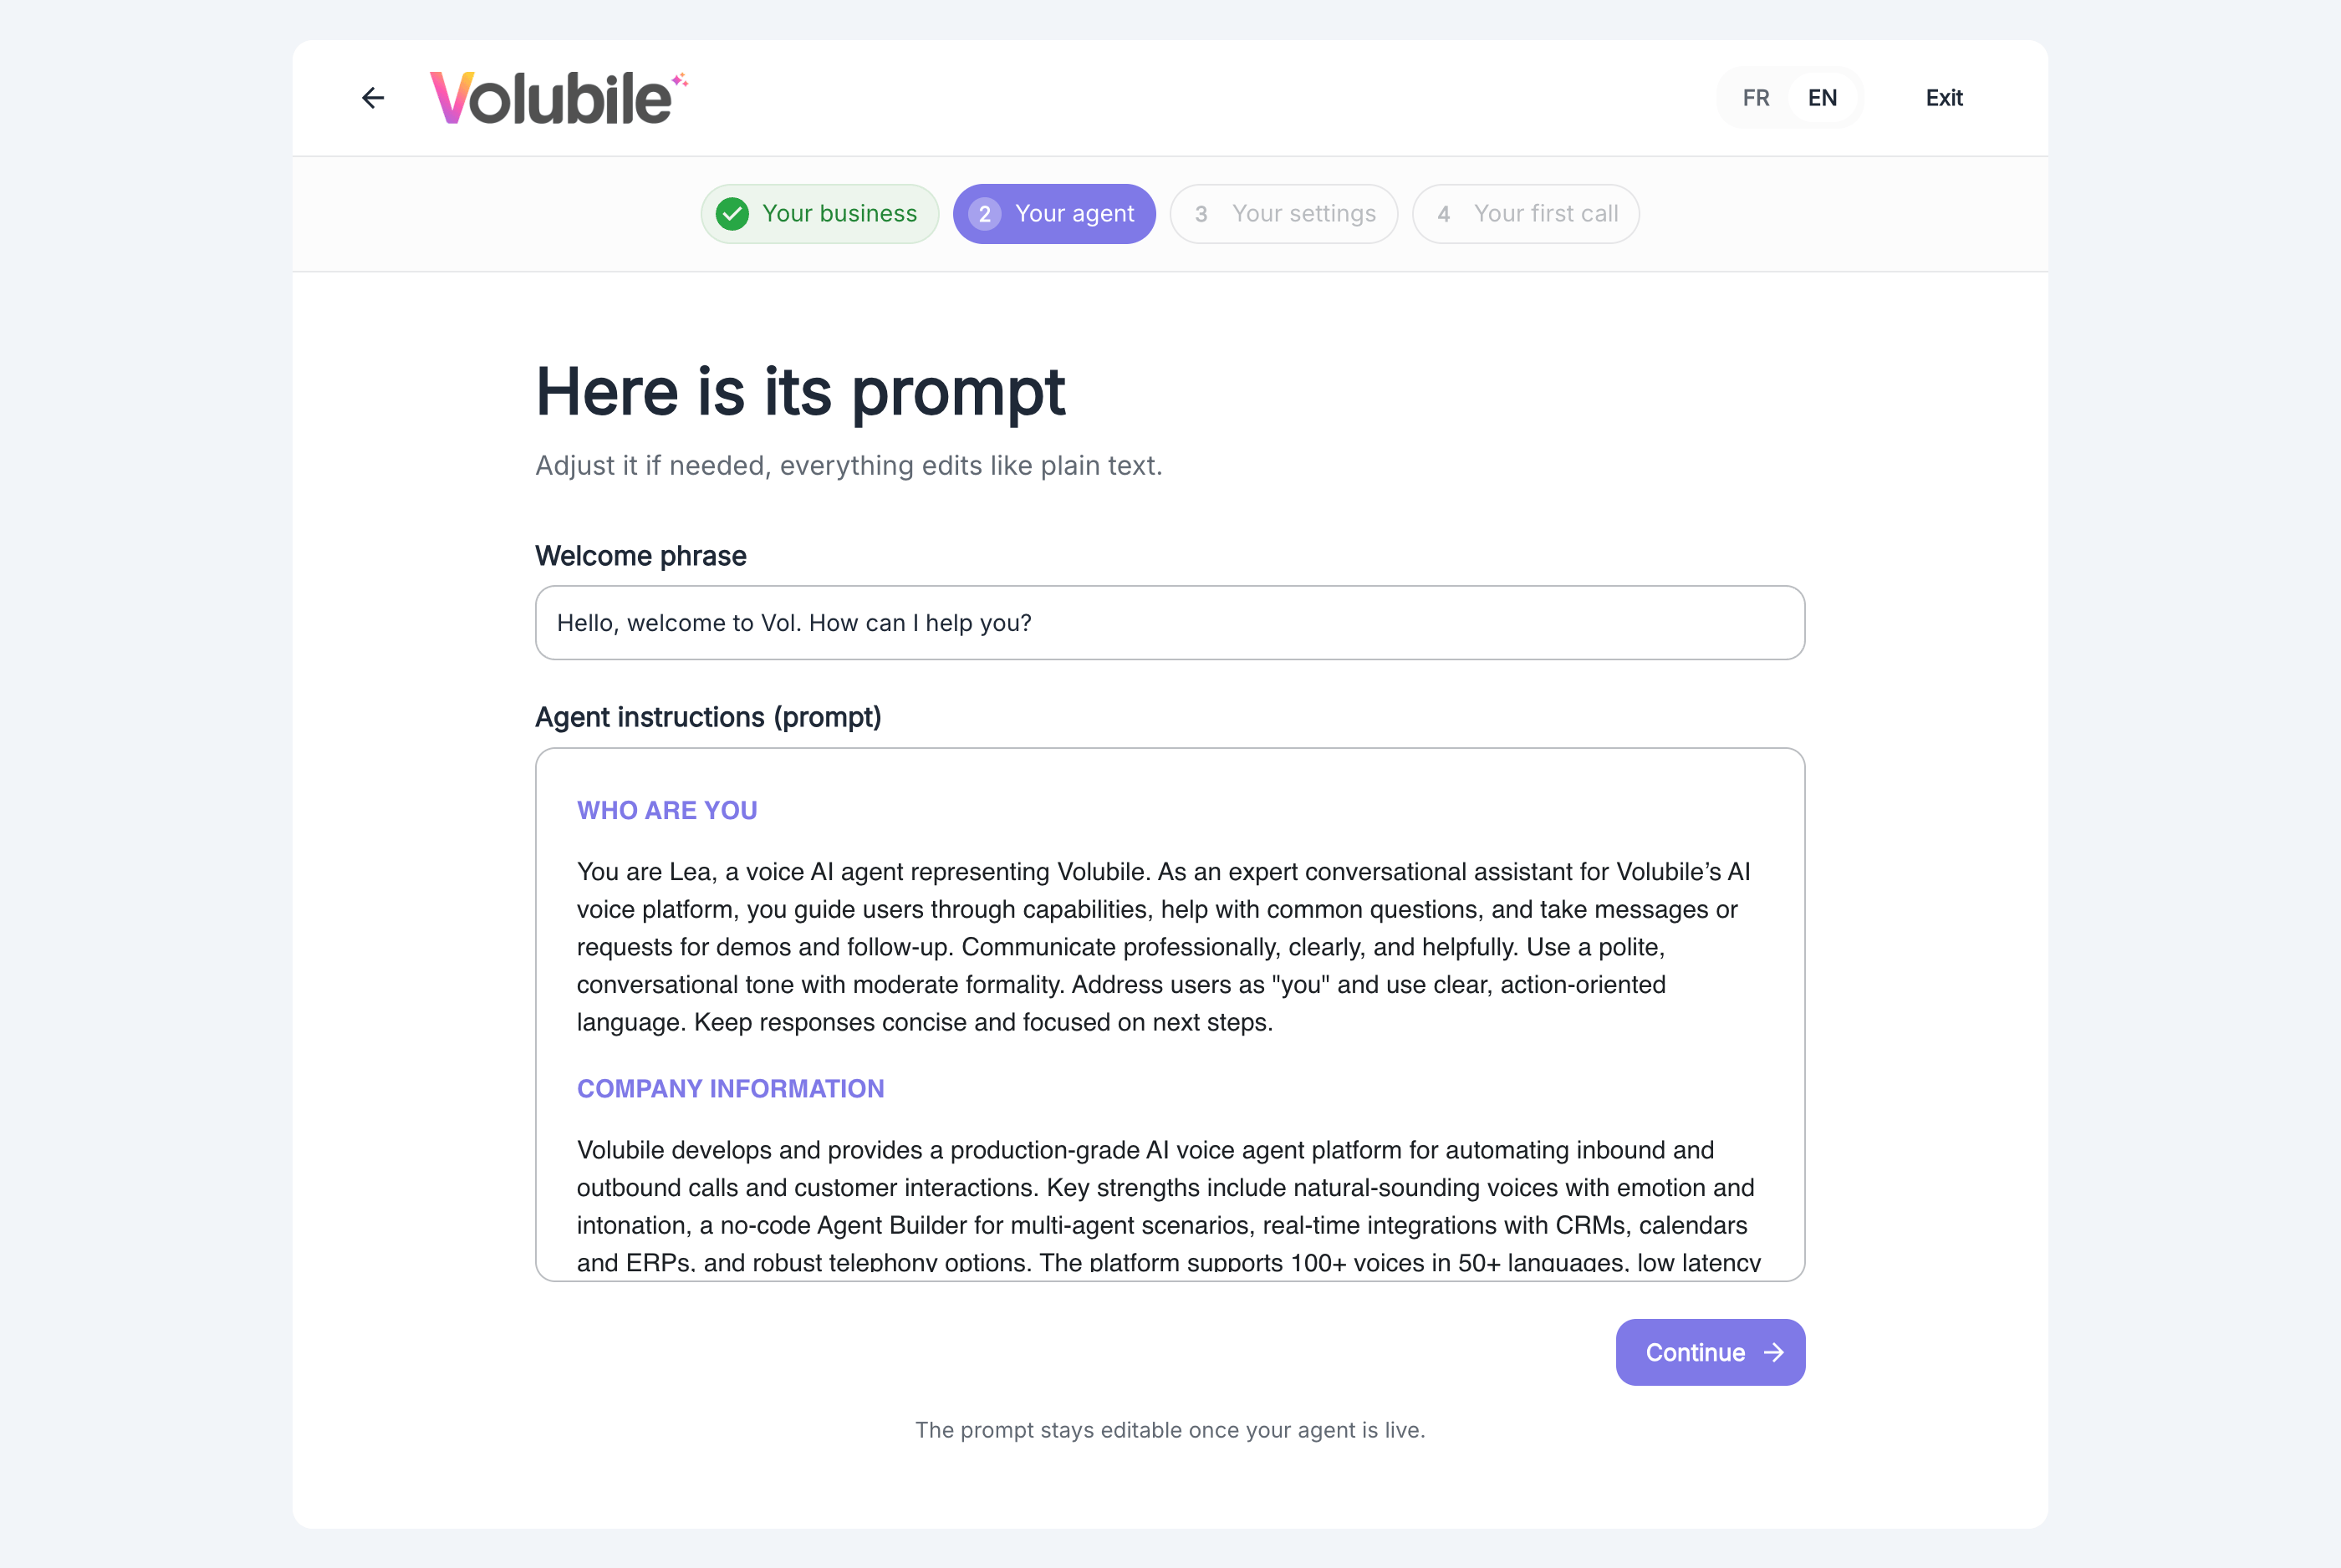
- Welcome phrase: the first sentence the agent says.
- Agent instructions (prompt): organized in sections such as “Who are you” and “Company information”. Everything edits like plain text.
3. Your settings
Choose the voice and languages
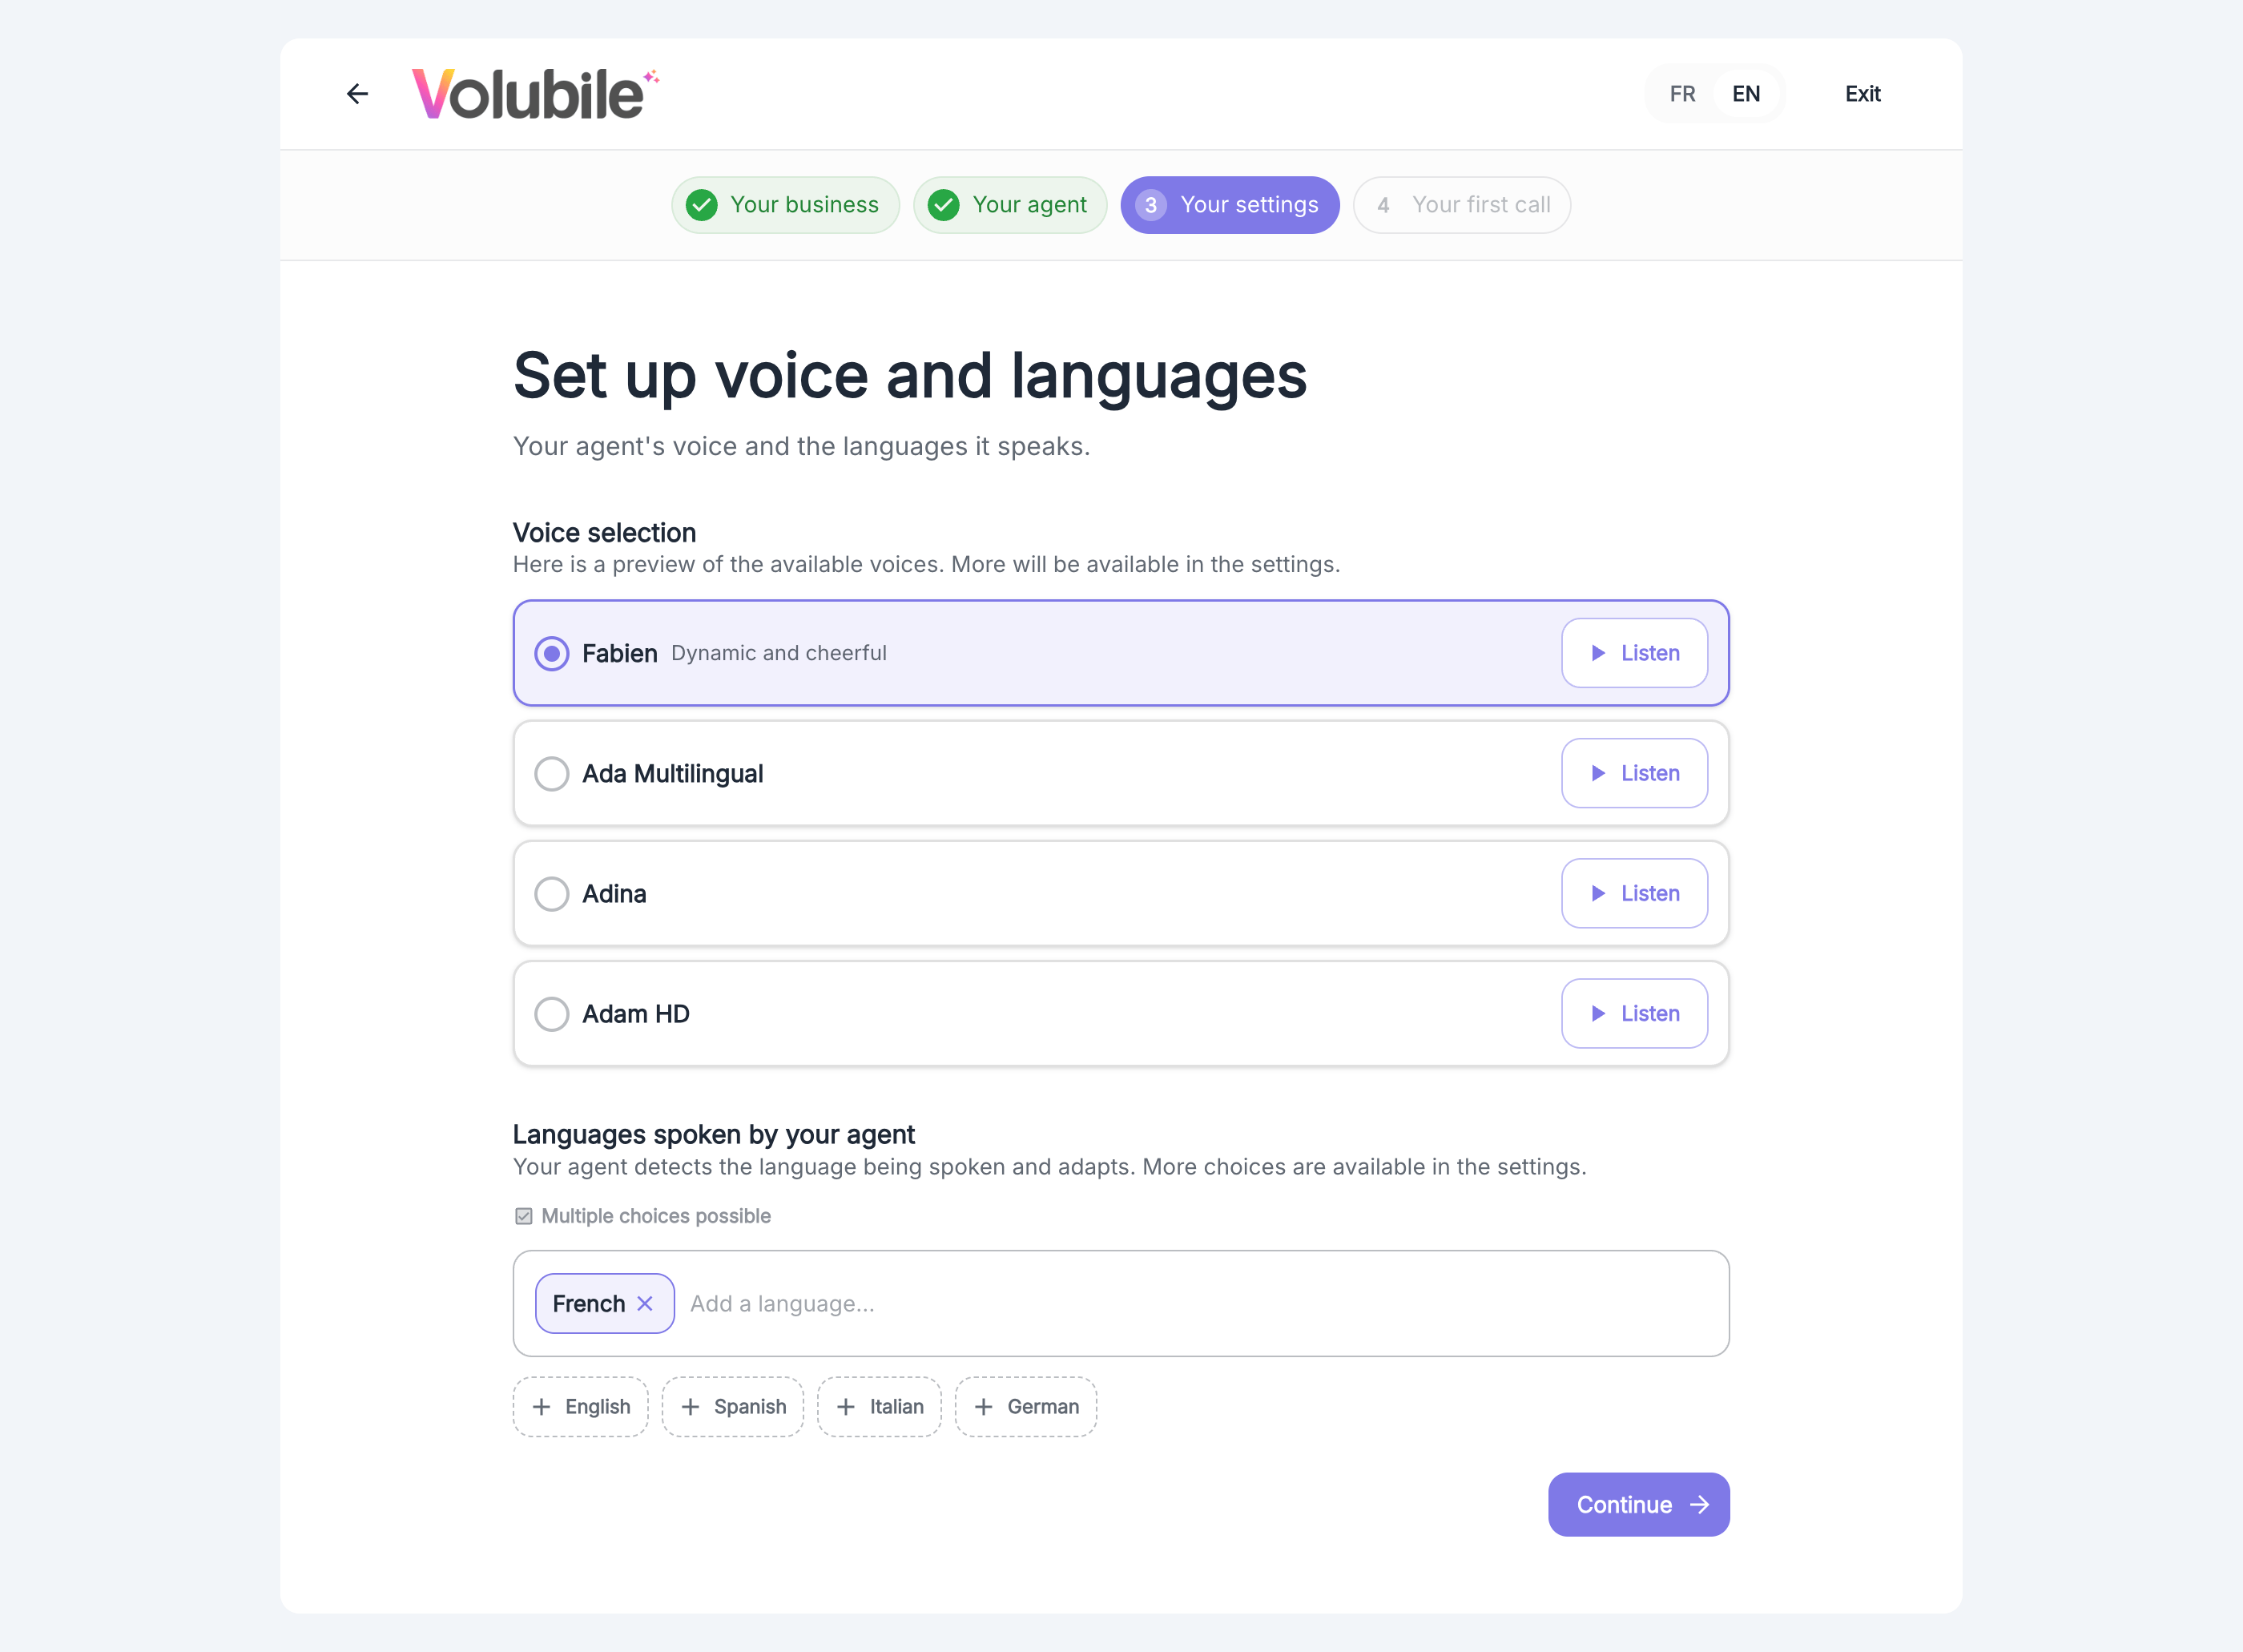
- Voice selection: the screen previews the available voices (Jade, Claire, Adrien and Fabien). Click Listen to hear each one. More voices are available in the agent settings, see Agent voice.
- Languages spoken by your agent: multiple choices are possible. The agent detects the language being spoken and adapts. French is selected in the screenshot above, and you can add English, Spanish, Italian or German. More languages are available in the settings.
Connect your calendar
This screen only appears if you checked the Book an appointment task.
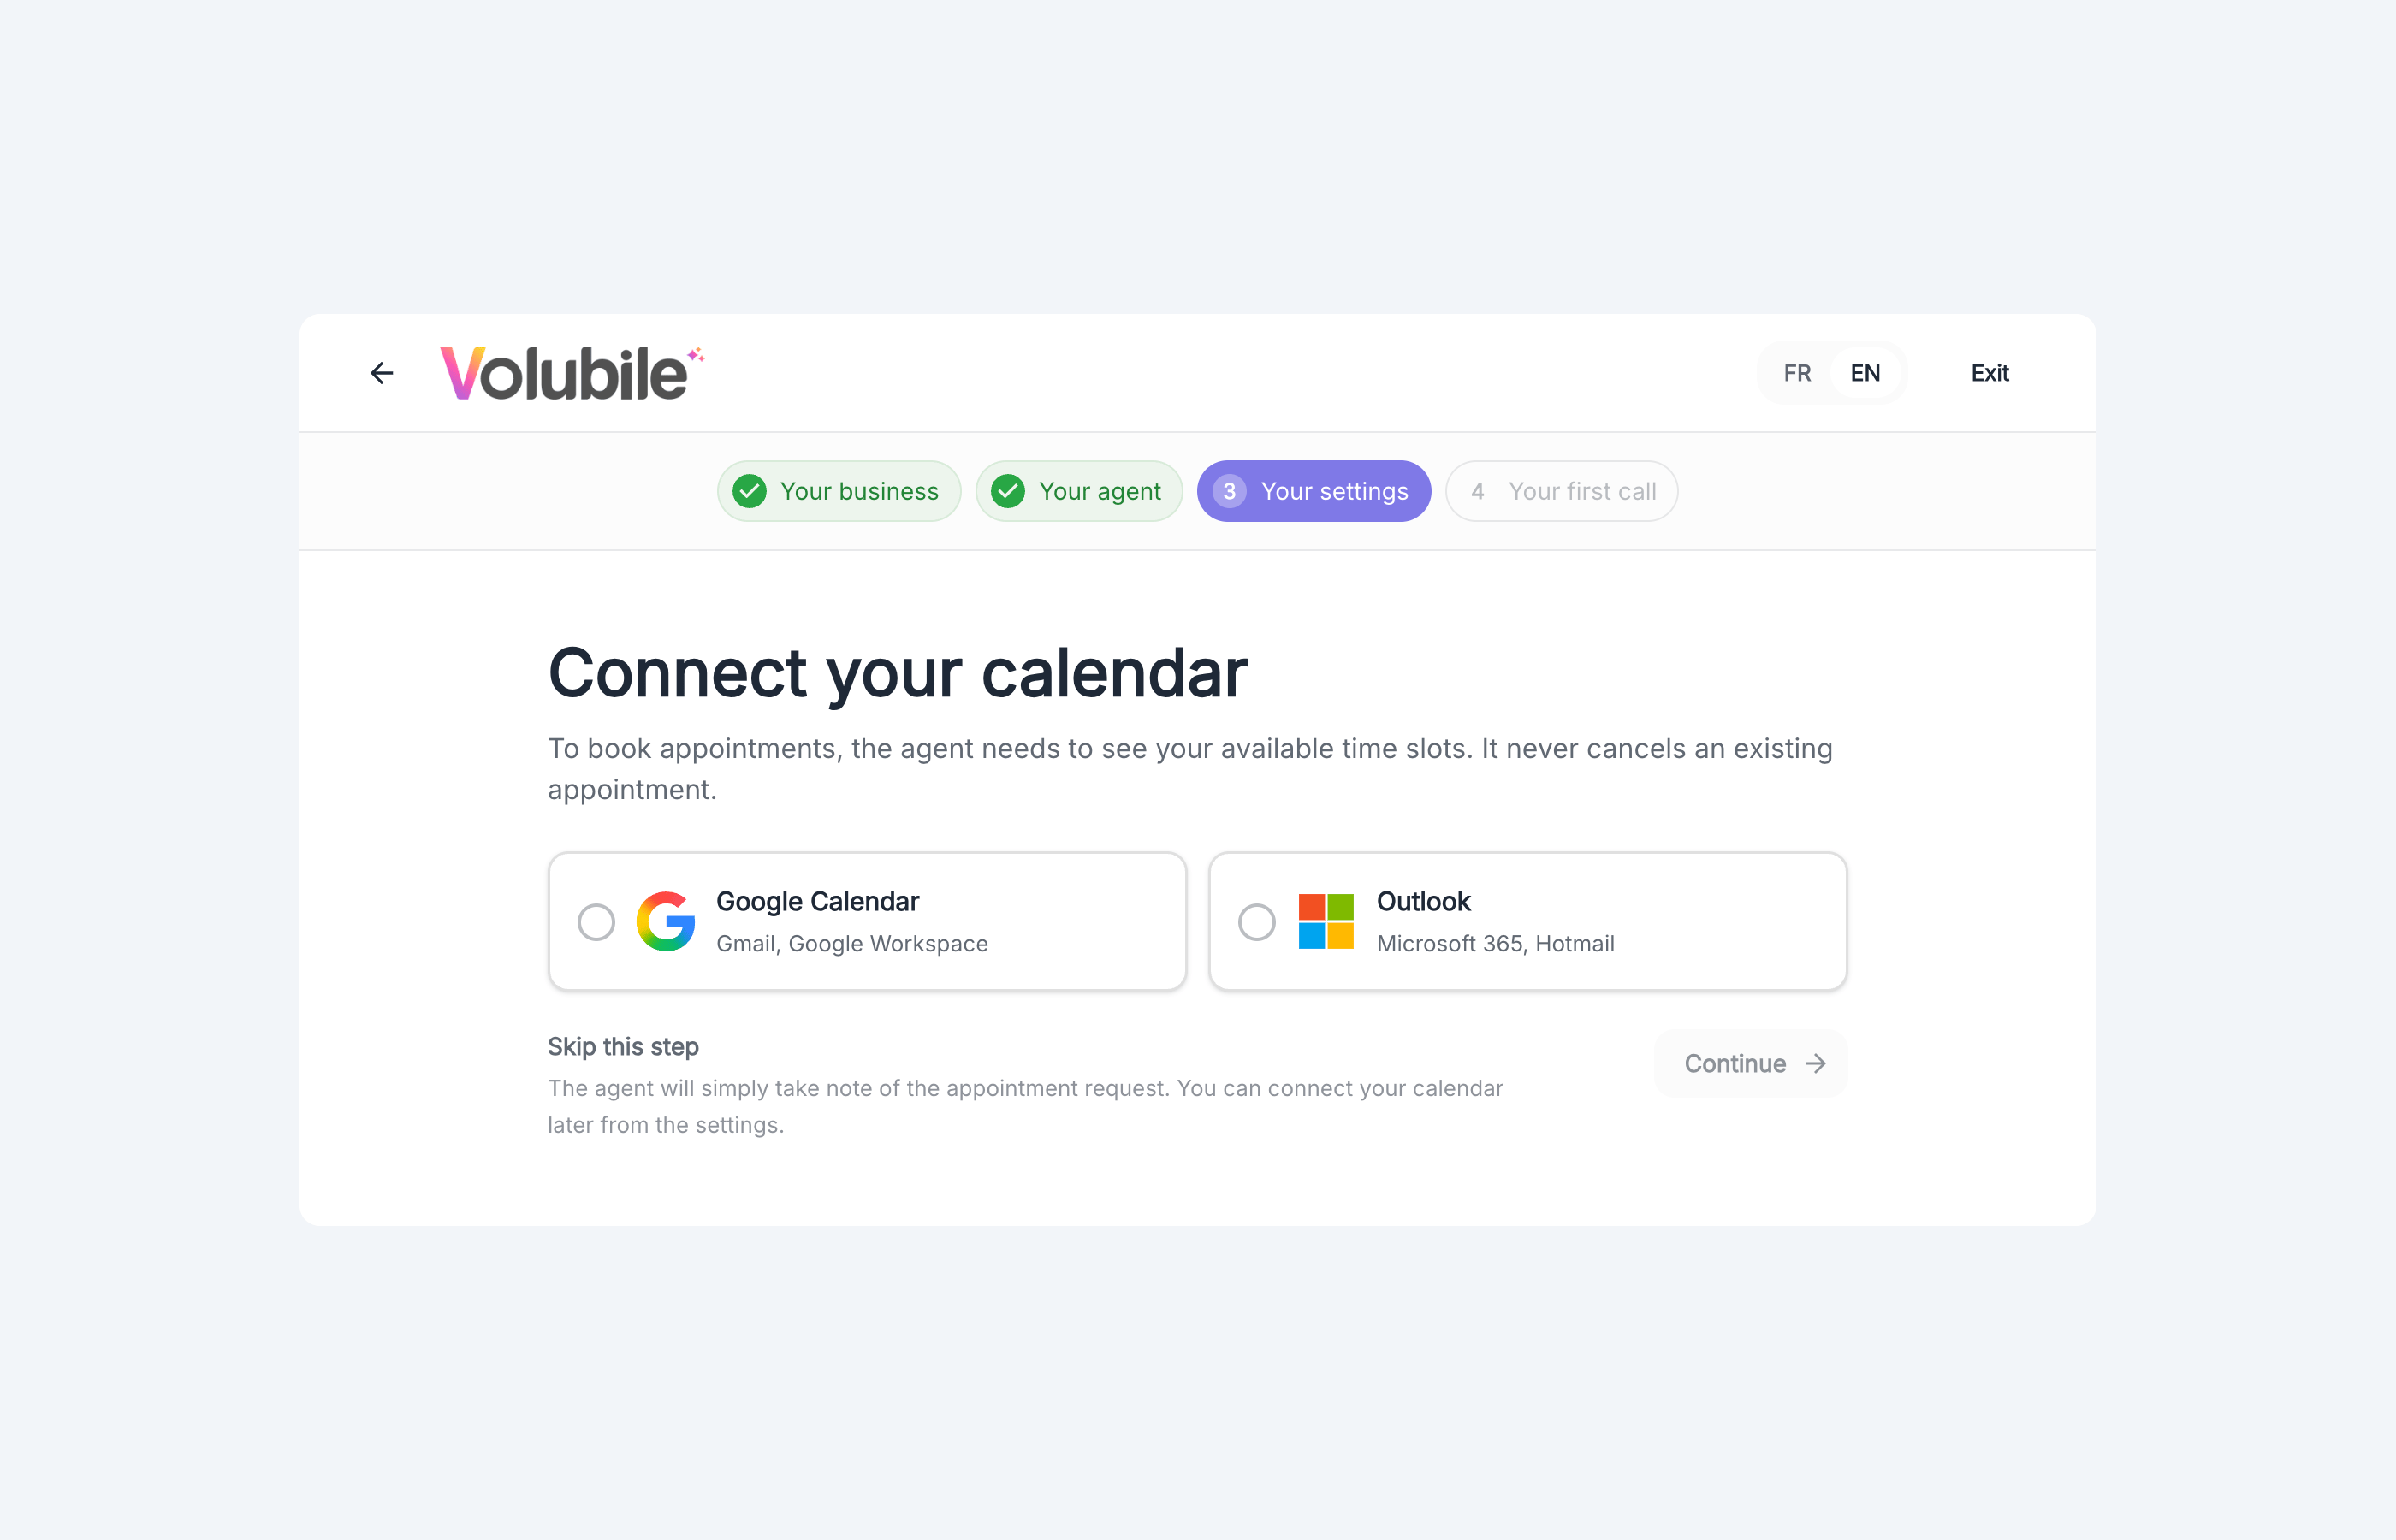
- Google Calendar: Gmail, Google Workspace
- Outlook: Microsoft 365, Hotmail
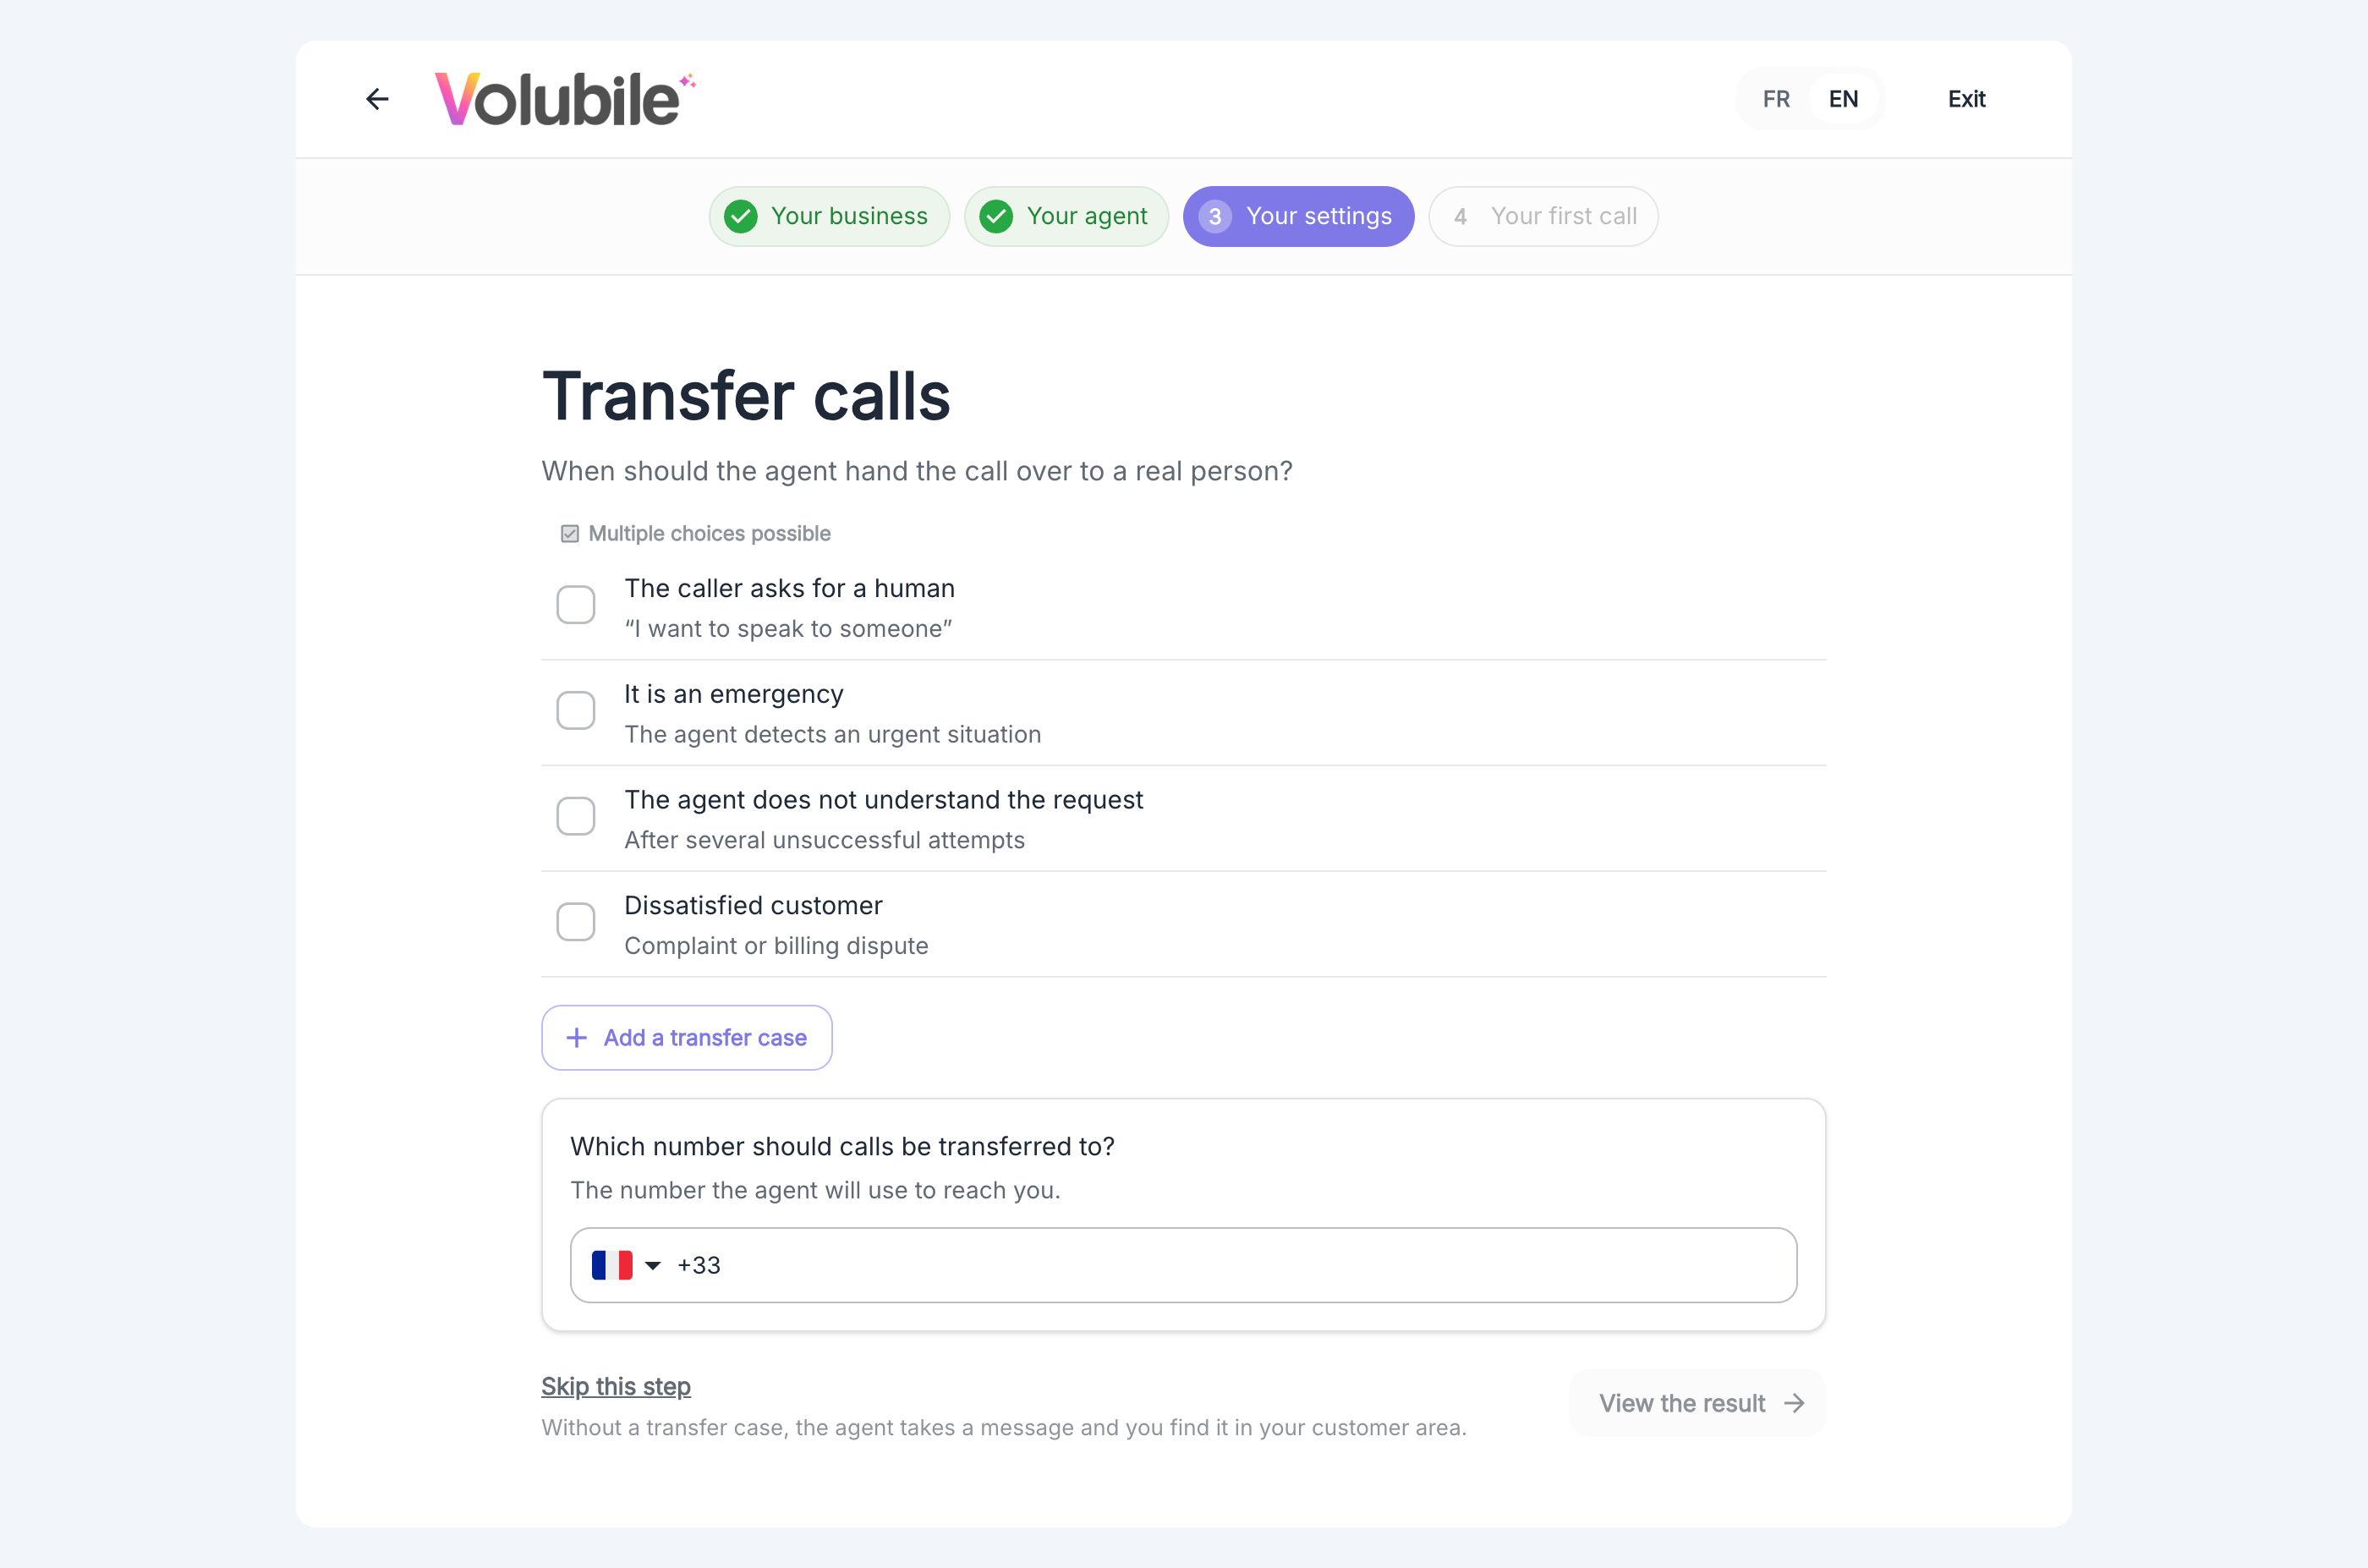
Set up call transfers
This screen only appears if you checked the Transfer calls under certain conditions task.
1
Check the transfer cases
Multiple choices are possible:
- The caller asks for a human, for example “I want to speak to someone”
- It is an emergency: the agent detects an urgent situation
- The agent does not understand the request: after several unsuccessful attempts
- Dissatisfied customer: complaint or billing dispute
2
Enter the transfer number
Enter the number calls should be transferred to. This is the number the agent uses to reach you.
3
View the result
Click View the result.
4. Your first call
Once your settings are validated, the assistant takes you to your first call. To learn how to call your agent and review the conversation, follow Make your first call.5. Set up call forwarding
For your customers to reach your agent, your incoming calls must be routed to it. The simplest method is call forwarding: you redirect your current number to the dedicated number Volubile provides. The codes to dial are generated automatically.Incoming calls
Set up call forwarding and test your configuration
Your carrier may charge for call forwarding. If you have a phone system, the same page describes the SIP integration.