> ## Documentation Index
> Fetch the complete documentation index at: https://docs.volubile.ai/llms.txt
> Use this file to discover all available pages before exploring further.
# Users
> Manage the users who can access the back office of your Volubile platform
 ## Overview
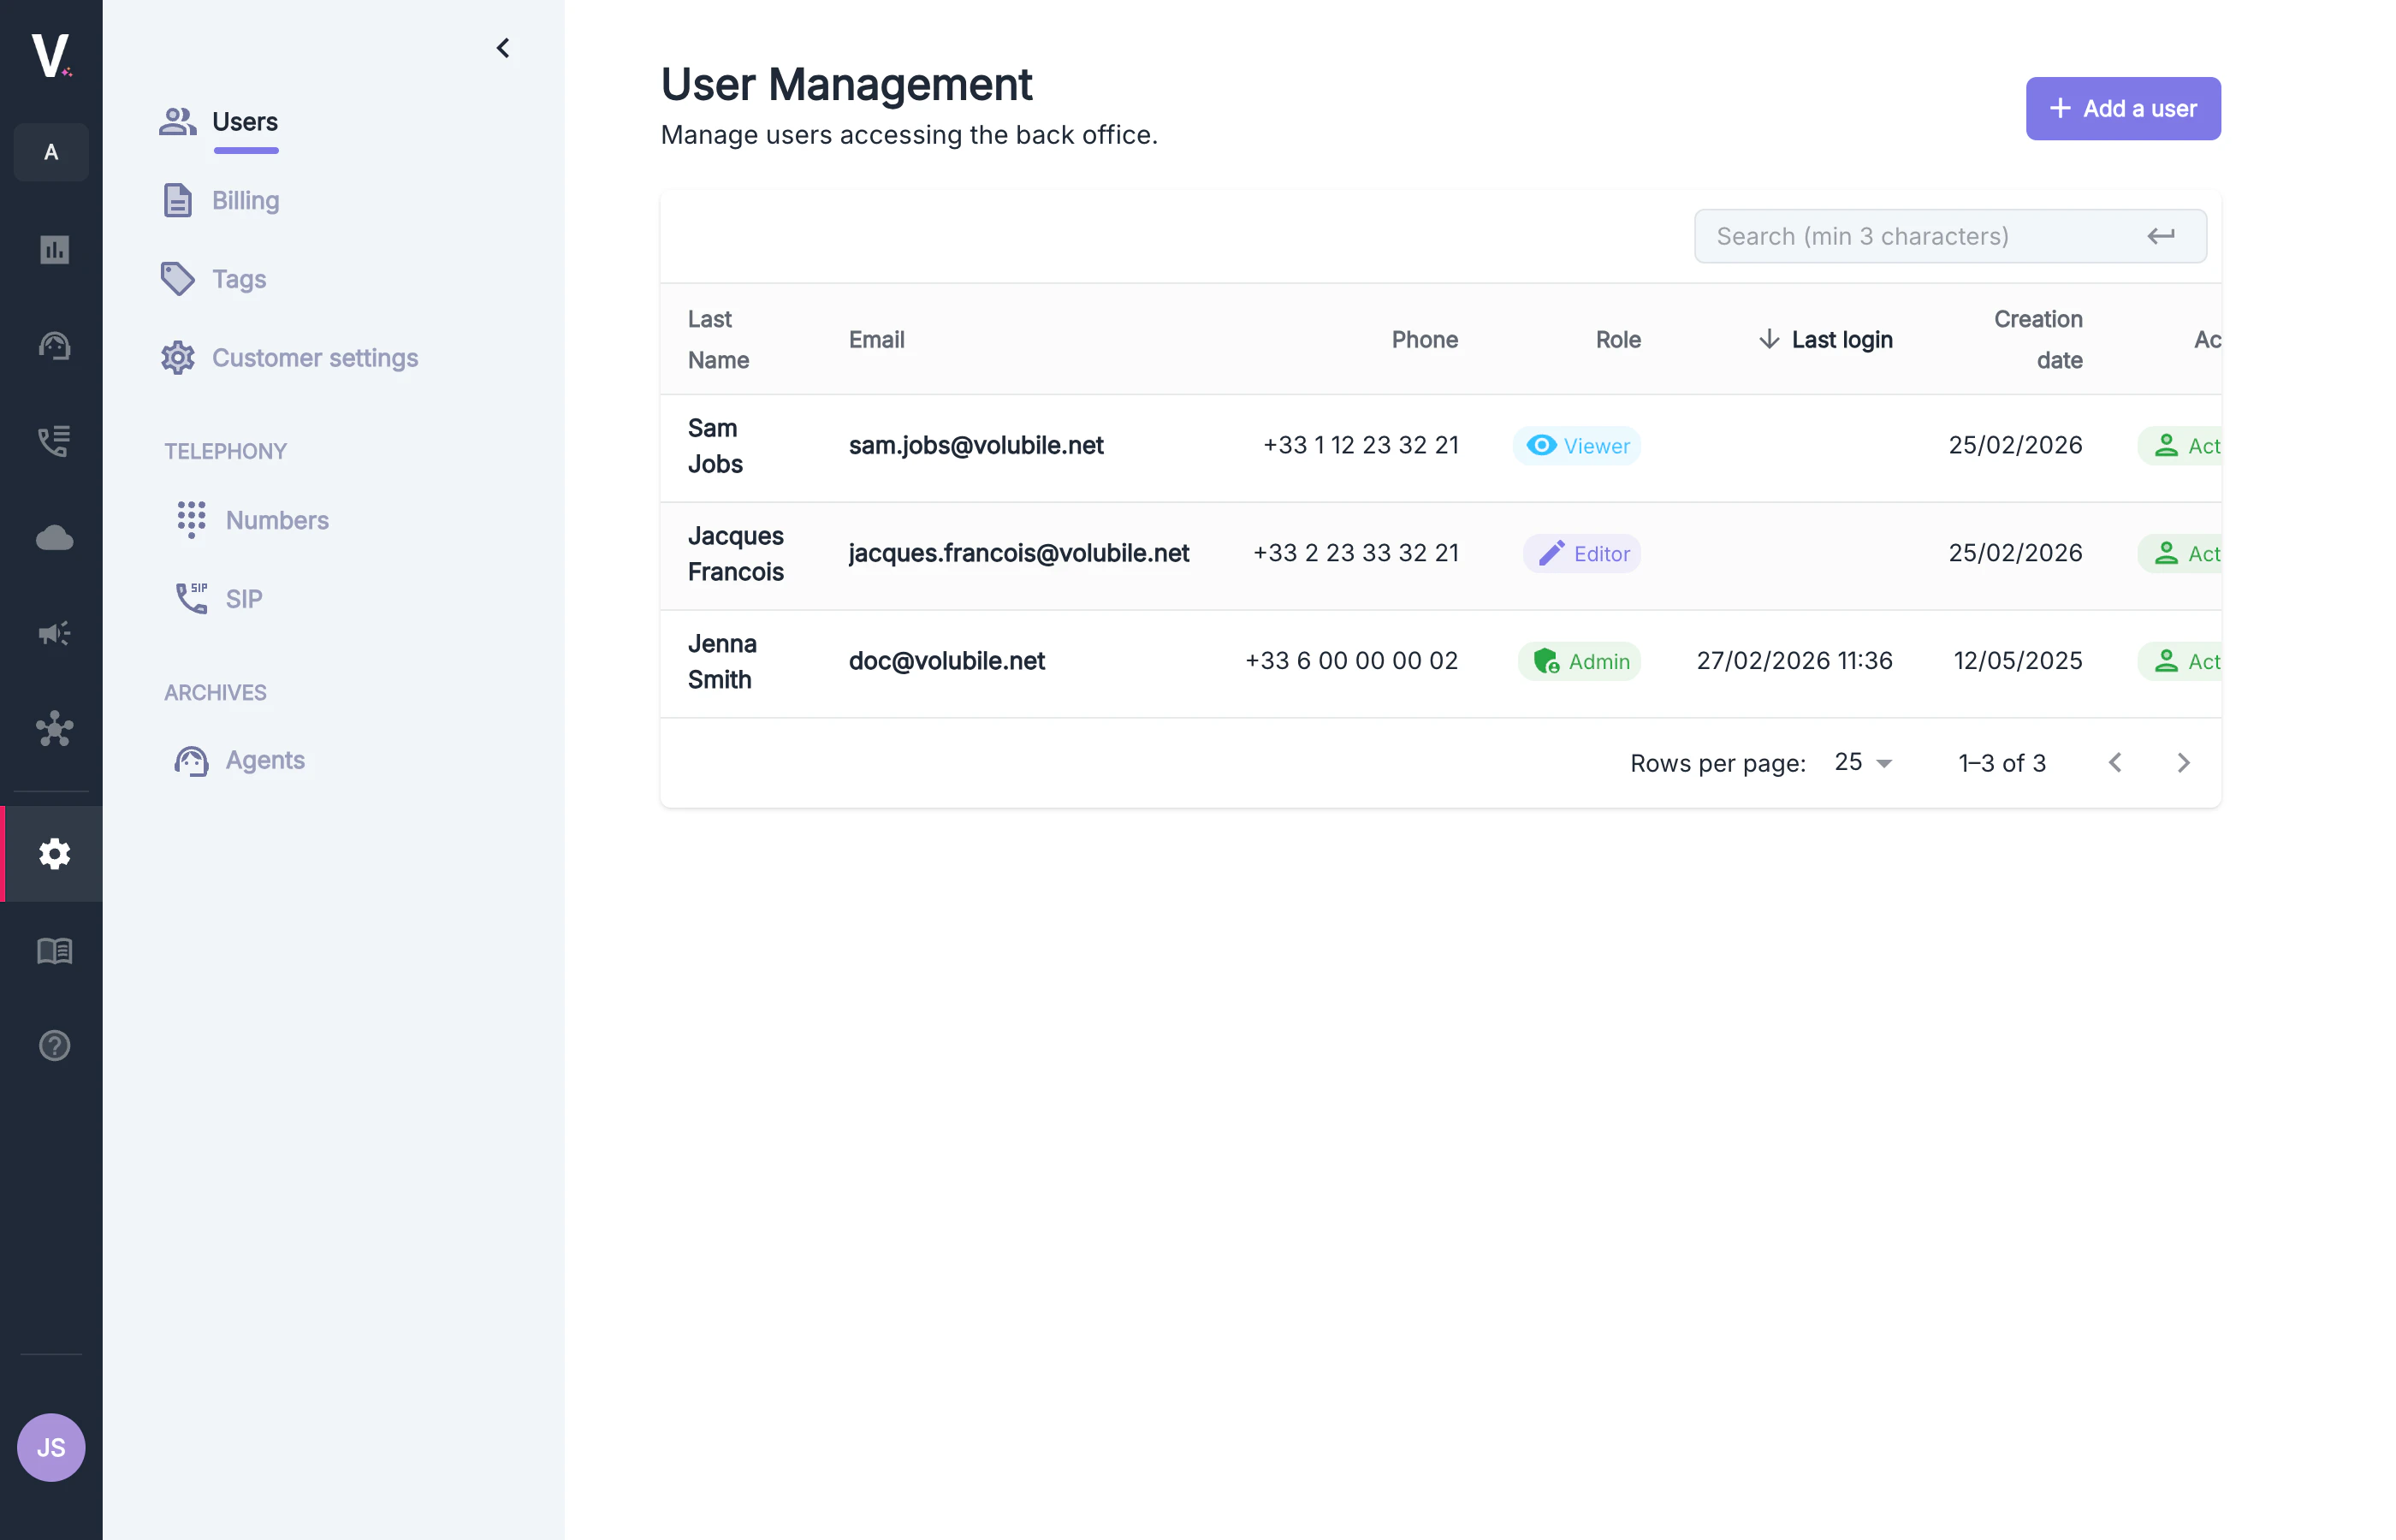
The user management page centralizes all actions related to access control within your Volubile workspace. It allows you to:
* View all users with access to the back office
* Create new user accounts
* Track recent login activity
* Assign and modify user roles
## Management Interface
### User Table
The user table displays the following information:
| Column | Description |
| ------------- | ----------------------------------- |
| Name | User’s last name |
| E-mail | Login identifier |
| Phone | User’s phone number |
| Role | Assigned access level |
| Last login | Date and time of last activity |
| Creation date | Date the user account was created |
| Active | Account status (active or inactive) |
| Actions | Edit / Reset password |
You can sort the table by clicking on column headers. The "Last login" column is especially useful for identifying
inactive accounts.
Use the search bar at the top of the table to filter users. Enter at least 3 characters to trigger the search.
***
## User Roles
Volubile provides three access roles, each with clearly defined permissions.
### **Admin**
Admins have complete control over the workspace.
**Can:**
* Manage members: add, remove, and change roles
* Manage billing: usage, subscriptions, invoices, payment methods
* Create, edit, and delete all resources: agents, conversation flows, knowledge bases, voices
* Access all data, including raw transcripts and recordings
* Configure telephony settings
* Modify workspace settings
* Manage API keys, public keys, webhooks, and capacity limits (concurrency, CPS)
**Cannot:**
* Nothing — Admins have full permissions.
***
### **Editor**
Editors have full access to creation, testing, and analytics features, but no administrative permissions.
**Can:**
* Create and modify agents, conversation flows, knowledge bases, and voices
* Test and simulate interactions
* Access logs, transcripts, recordings, and analytics
* Export data
* Run calls and campaigns
* Configure external connections
**Cannot:**
* Manage billing
* Manage workspace members
* Manage API keys, webhooks, or global settings
* Modify workspace-level configuration
***
### **Viewer**
Viewers have read‑only access with no ability to view sensitive data.
**Can:**
* View calls and analytics
* Start a call
* Access scrubbed history
* View grouped telephony resources
**Cannot:**
* Create, edit, or delete resources
* Access API keys, webhooks, or connections
* Manage billing, settings, or members
***
Roles are assigned when creating a user and can be updated at any time using the **Edit** button in the *Actions* column.
A user may have different roles across different clients.
***
## Creating a New User
## Overview
The user management page centralizes all actions related to access control within your Volubile workspace. It allows you to:
* View all users with access to the back office
* Create new user accounts
* Track recent login activity
* Assign and modify user roles
## Management Interface
### User Table
The user table displays the following information:
| Column | Description |
| ------------- | ----------------------------------- |
| Name | User’s last name |
| E-mail | Login identifier |
| Phone | User’s phone number |
| Role | Assigned access level |
| Last login | Date and time of last activity |
| Creation date | Date the user account was created |
| Active | Account status (active or inactive) |
| Actions | Edit / Reset password |
You can sort the table by clicking on column headers. The "Last login" column is especially useful for identifying
inactive accounts.
Use the search bar at the top of the table to filter users. Enter at least 3 characters to trigger the search.
***
## User Roles
Volubile provides three access roles, each with clearly defined permissions.
### **Admin**
Admins have complete control over the workspace.
**Can:**
* Manage members: add, remove, and change roles
* Manage billing: usage, subscriptions, invoices, payment methods
* Create, edit, and delete all resources: agents, conversation flows, knowledge bases, voices
* Access all data, including raw transcripts and recordings
* Configure telephony settings
* Modify workspace settings
* Manage API keys, public keys, webhooks, and capacity limits (concurrency, CPS)
**Cannot:**
* Nothing — Admins have full permissions.
***
### **Editor**
Editors have full access to creation, testing, and analytics features, but no administrative permissions.
**Can:**
* Create and modify agents, conversation flows, knowledge bases, and voices
* Test and simulate interactions
* Access logs, transcripts, recordings, and analytics
* Export data
* Run calls and campaigns
* Configure external connections
**Cannot:**
* Manage billing
* Manage workspace members
* Manage API keys, webhooks, or global settings
* Modify workspace-level configuration
***
### **Viewer**
Viewers have read‑only access with no ability to view sensitive data.
**Can:**
* View calls and analytics
* Start a call
* Access scrubbed history
* View grouped telephony resources
**Cannot:**
* Create, edit, or delete resources
* Access API keys, webhooks, or connections
* Manage billing, settings, or members
***
Roles are assigned when creating a user and can be updated at any time using the **Edit** button in the *Actions* column.
A user may have different roles across different clients.
***
## Creating a New User
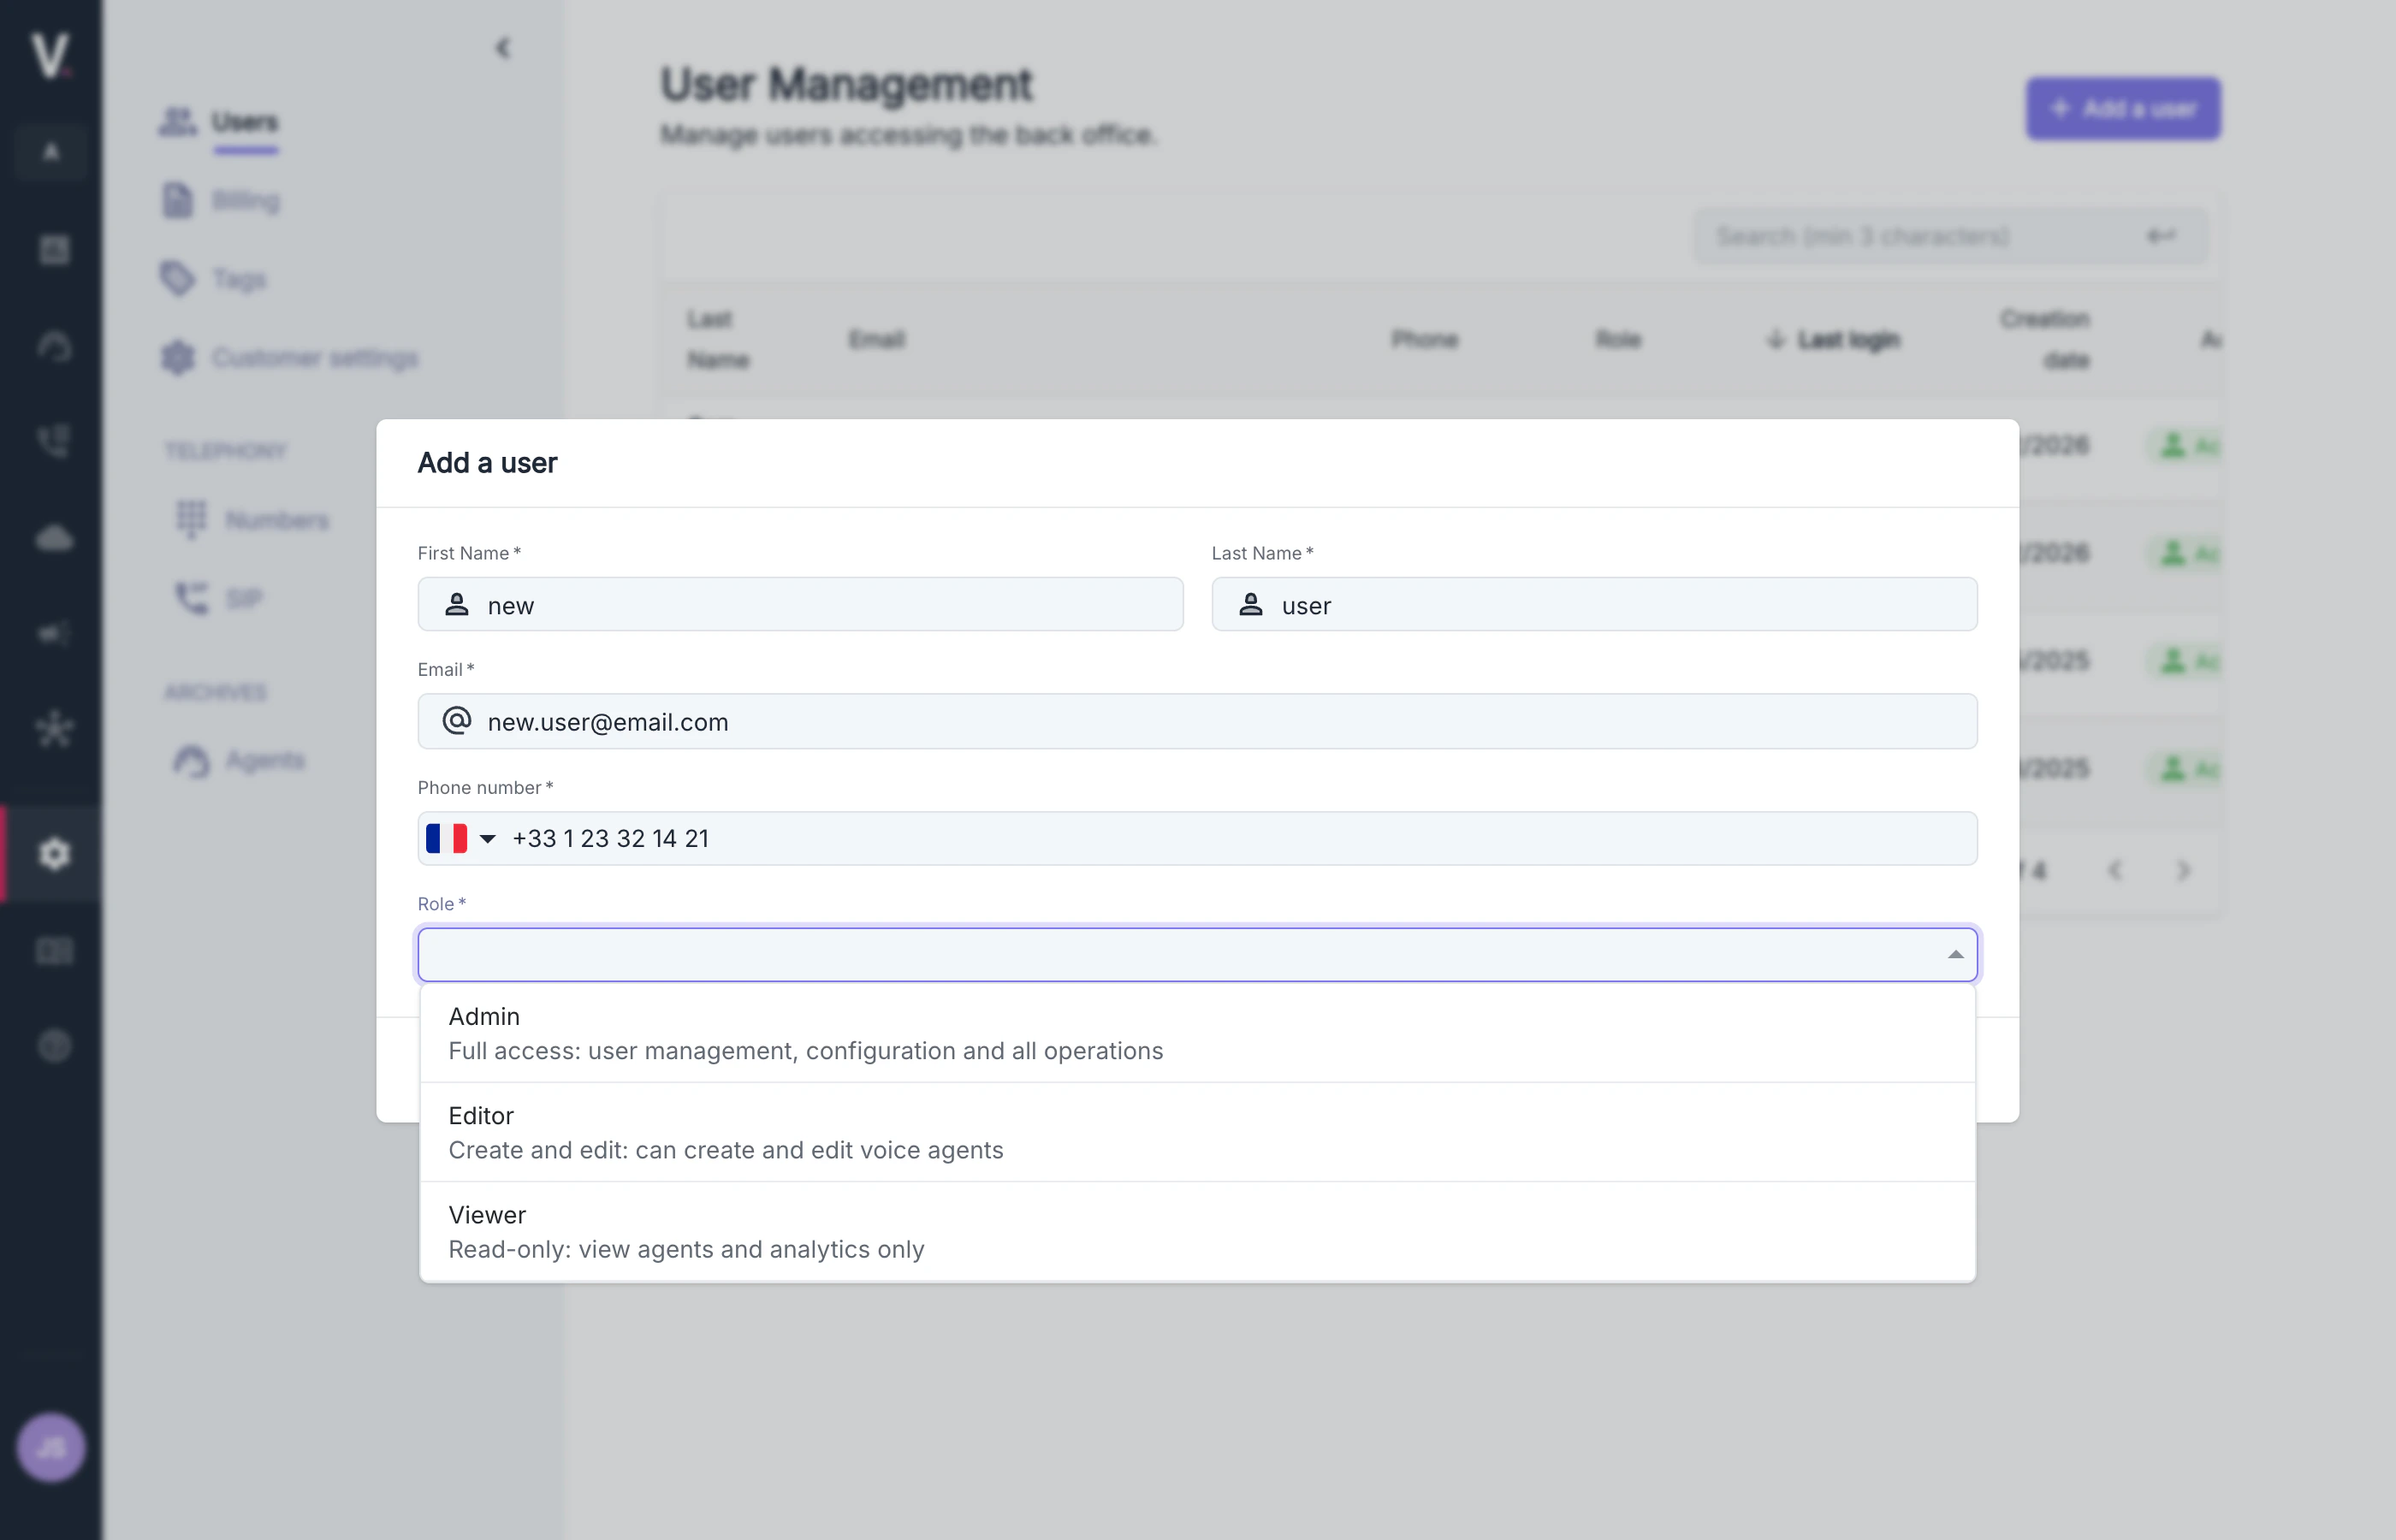 To create a new user, click the **New user** button in the top-right corner of the page.
All fields marked with an asterisk (\*) are mandatory.
### User Creation Form
* **First name**\* — User’s first name
* **Last name**\* — User’s last name
* **E-mail**\* — Login identifier
* **Phone number**\* — Number including the international prefix
* **Admin**
* **Editor**
* **Viewer**
After the account is created, the user will automatically receive an email to set their password and activate their
profile.
***
## Frequently Asked Questions
You do not need to create a new account.
Click **Send email** in the *Actions* column to send a password reset link.
To create a new user, click the **New user** button in the top-right corner of the page.
All fields marked with an asterisk (\*) are mandatory.
### User Creation Form
* **First name**\* — User’s first name
* **Last name**\* — User’s last name
* **E-mail**\* — Login identifier
* **Phone number**\* — Number including the international prefix
* **Admin**
* **Editor**
* **Viewer**
After the account is created, the user will automatically receive an email to set their password and activate their
profile.
***
## Frequently Asked Questions
You do not need to create a new account.
Click **Send email** in the *Actions* column to send a password reset link.